Week 5 - Overview
Here's a summary of the key knowledge points from Chapter 5:
1. **3D Printing Operation**: Understanding the mechanics and software used in 3D printing processes.
2. **Additive Manufacturing**: Learning about the process where material is added layer by layer to build an object.
3. **Subtractive Manufacturing**: Exploring the method that involves cutting away material from a solid block to form the object.
4. **3D Scanning**: Gaining skills in using 3D scanners to capture the dimensions of physical objects and converting them into digital 3D models through reverse engineering.
3D Printing: Advantages and Limitations
Advantages of 3D Printing
- Complexity at No Extra Cost:
3D printing can create complex shapes and internal structures that would be impossible or prohibitively expensive with traditional manufacturing methods. - Rapid Prototyping:
Speeds up the development process by allowing designers and engineers to produce prototypes within hours or days, rather than weeks or months, facilitating faster iterations and testing. - Customization:
Each item can be individually customized with minimal additional costs, making 3D printing ideal for custom medical devices like prosthetics and dental aids, or for bespoke consumer products. - Tool-less Manufacturing:
Unlike traditional manufacturing, which often requires expensive molds and tools, 3D printing does not require any. This reduces upfront costs and lead times. - Waste Reduction:
Additive manufacturing adds material layer by layer to build a part, leading to significantly less waste compared to subtractive methods, which cut away material from a larger block. - Accessibility:
With the decreasing cost of 3D printers, it has become more feasible for small businesses and individuals to manufacture or prototype their own designs. - Innovation:
Encourages innovation by allowing designers to experiment with complex designs and hybrid materials, pushing the boundaries of what’s possible in manufacturing.
Limitations of 3D Printing
- Material Limitations:
The range of materials that can be used is limited compared to traditional manufacturing. While there are many advancements, materials like certain metals and polymers can be challenging to print with the desired properties. - Size Limitations:
Most affordable 3D printers have small build volumes, which limits the size of parts that can be printed. Large-scale 3D printers exist but are much more expensive. - Structural Integrity:
3D printed objects may have weaker structural integrity than their traditionally manufactured counterparts, particularly if not properly optimized or processed. - Surface Finish:
The layer-by-layer construction can result in a ridged surface texture that might require additional post-processing like sanding or machining to achieve a smooth finish. - Speed and Cost for Mass Production:
While 3D printing is excellent for prototyping and small production runs, it can be less cost-effective and slower compared to traditional methods like injection molding for large scale production. - Technical Knowledge:
Operating a 3D printer and optimizing designs for additive manufacturing require a certain level of technical knowledge and expertise. - Post-Processing Requirements:
Many 3D printed parts require significant post-processing, which can include cleaning, curing, and surface finishing, adding to the time and cost of production.
we need to complete two projects: a team assignment and an individual assignment.
test the design rules for your 3D printer(s)
1.design and 3D print an object (small, few cm3, limited by printer time)that could not be made subtractively
2.3D scan an object (and optionally print it)
Reference Links
Week5 3D Scanning and Printing Guide for my Fab Academy Journey.My personal assignment
3D Design of Wheel
Softeware & Machine instructions
Software:Shapr3D:
I used Shapr3D to design the parametric construction kit.
Shapr3D is a software that allows users to create 3D models and animations using a drag-and-drop interface.
It is available for Windows, Mac, and Linux operating systems.
I downloaded the software from the iTunes store and installed it on my iPad.
It very easy to use and has a lot of features, including a 3D model editor, a path editor, and a rendering engine.
I just use my apple pencil to draw the designs and export them as DXF files.

Here is the link to the software's Introduction page: Shapr3D Introduction
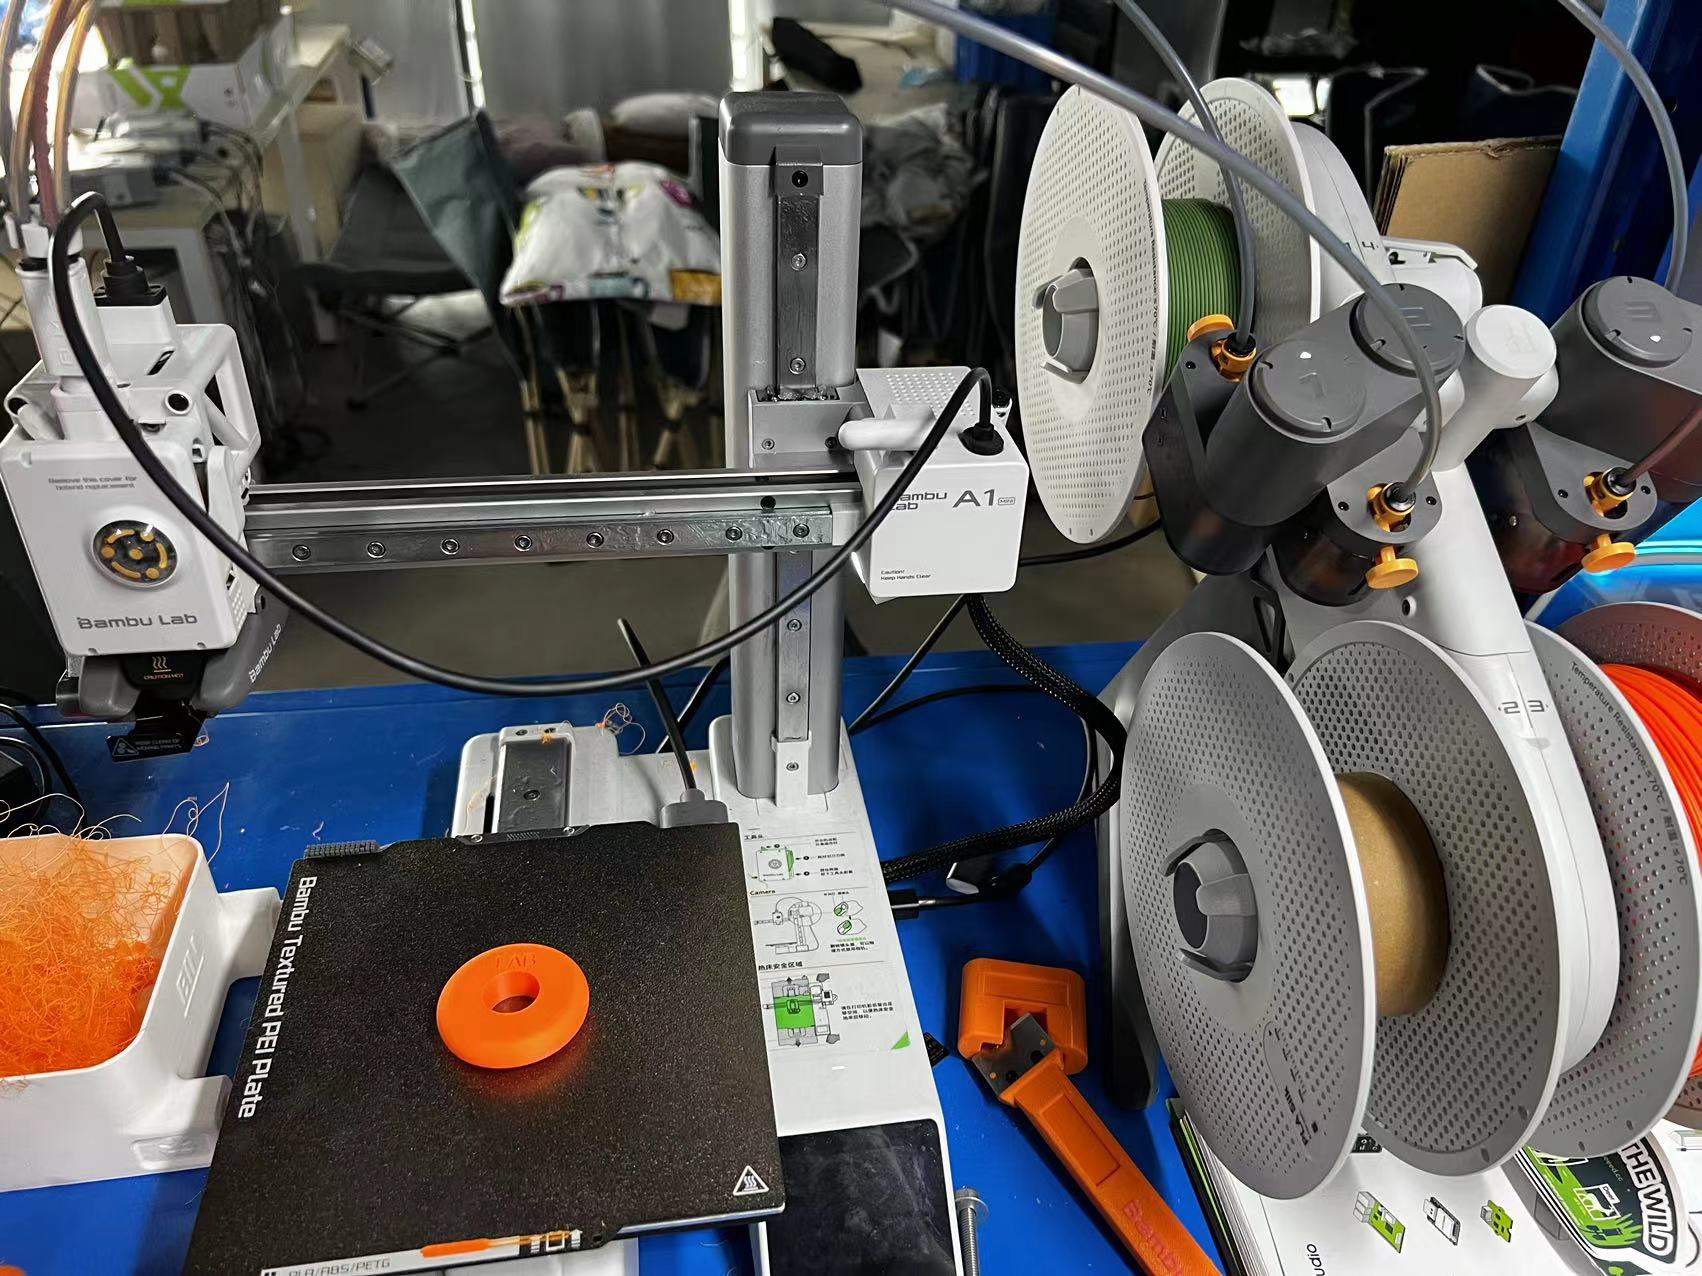
The printer is a small and cheap 3D printer that can be used for prototyping and small-scale 3D printing.
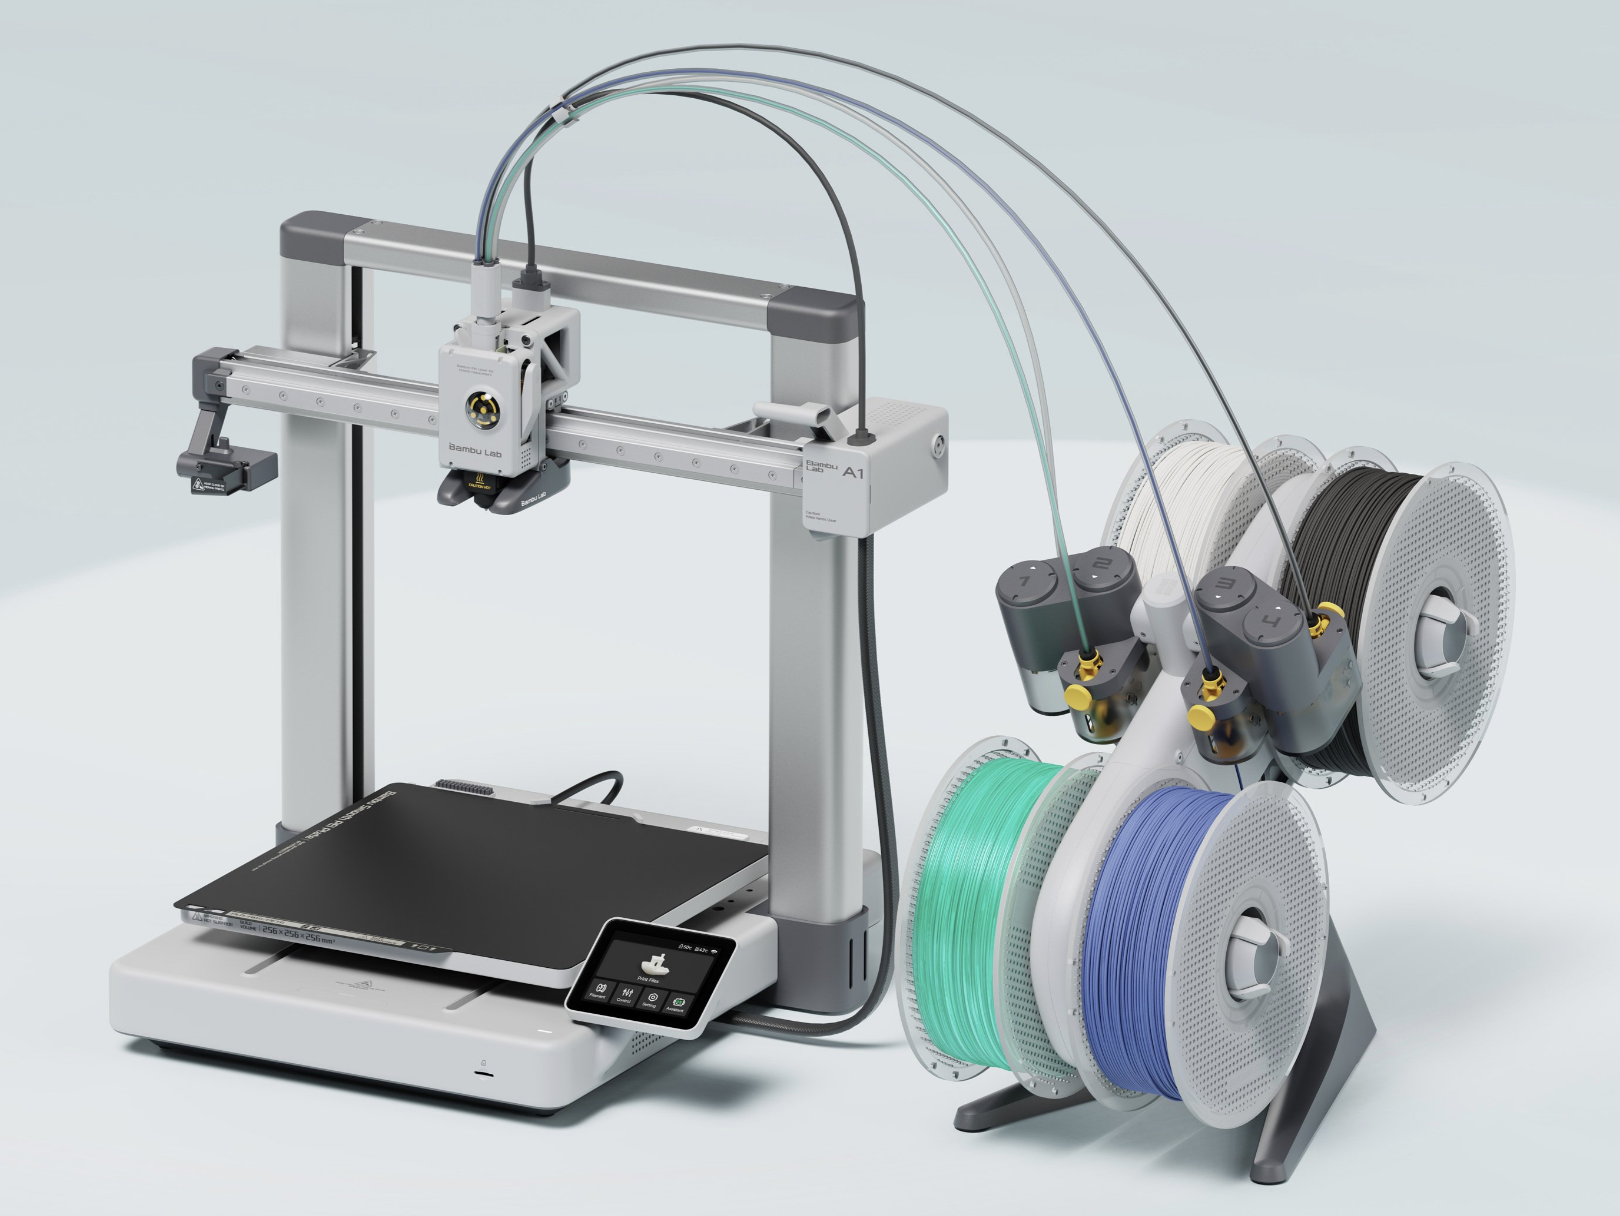
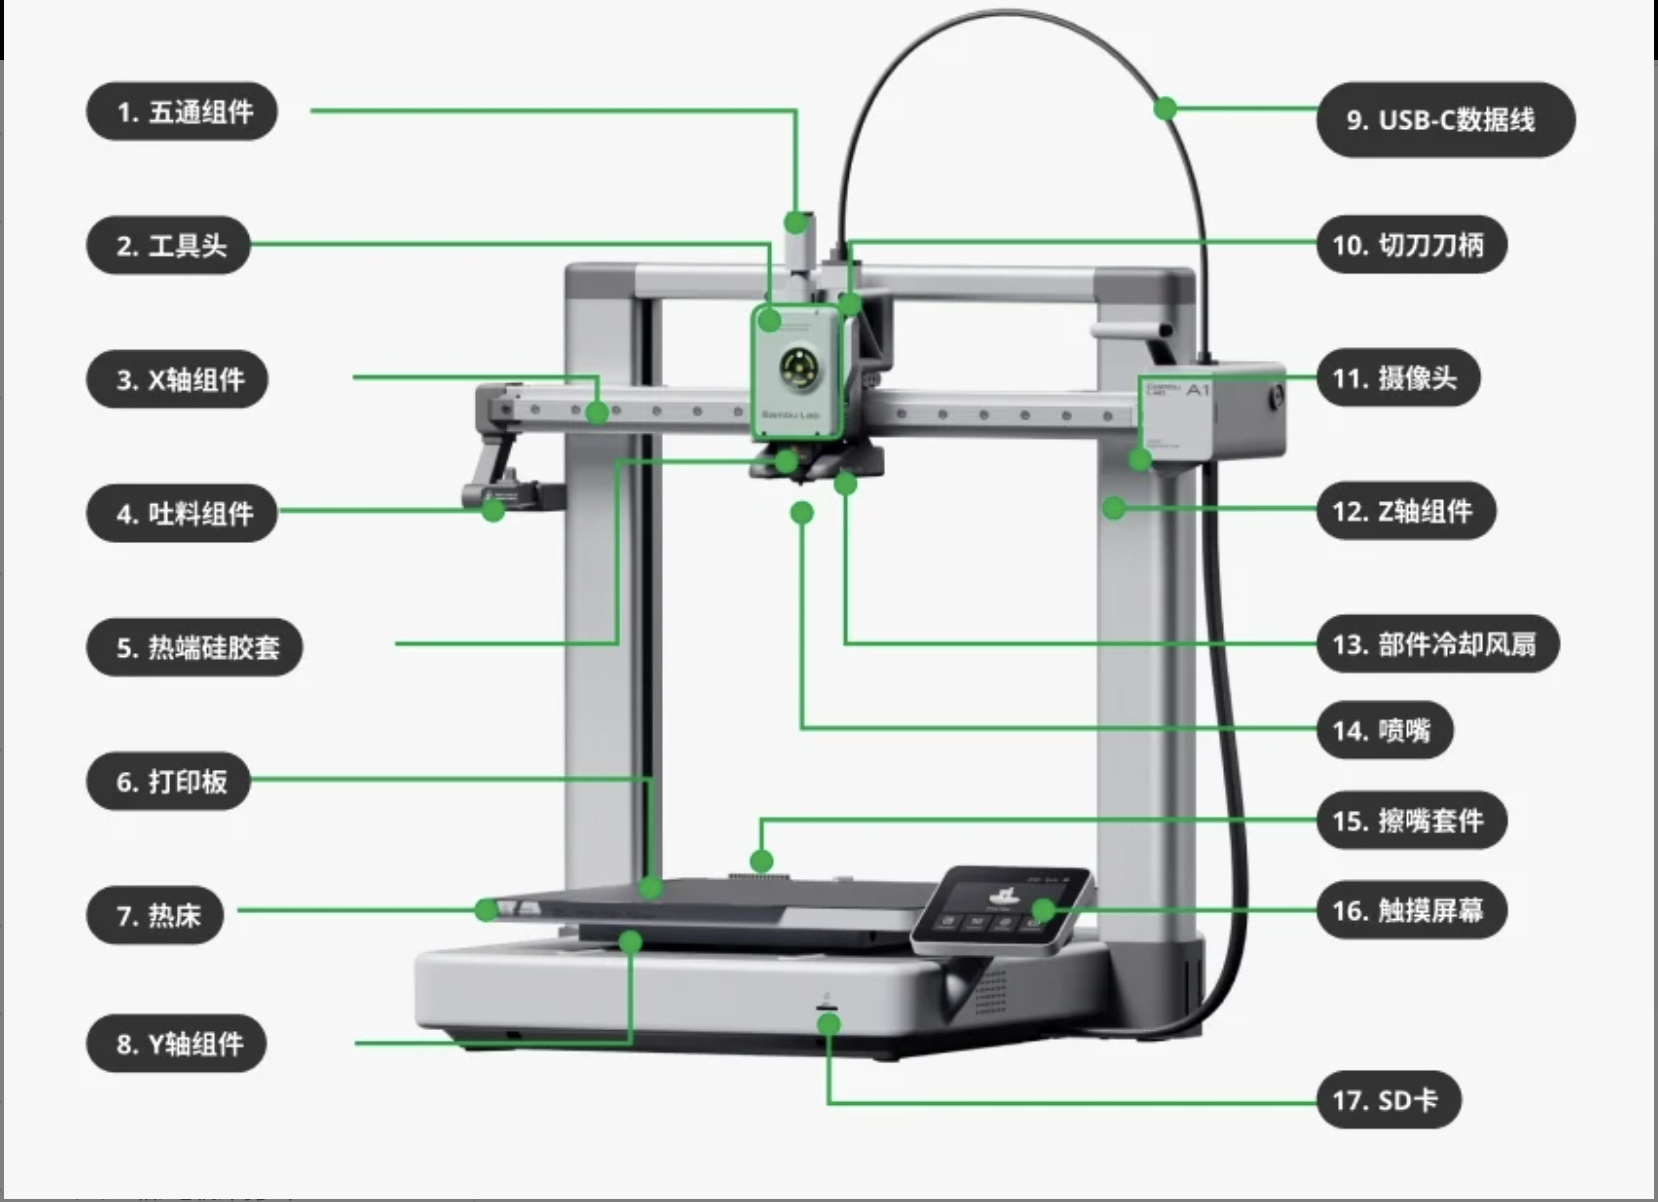
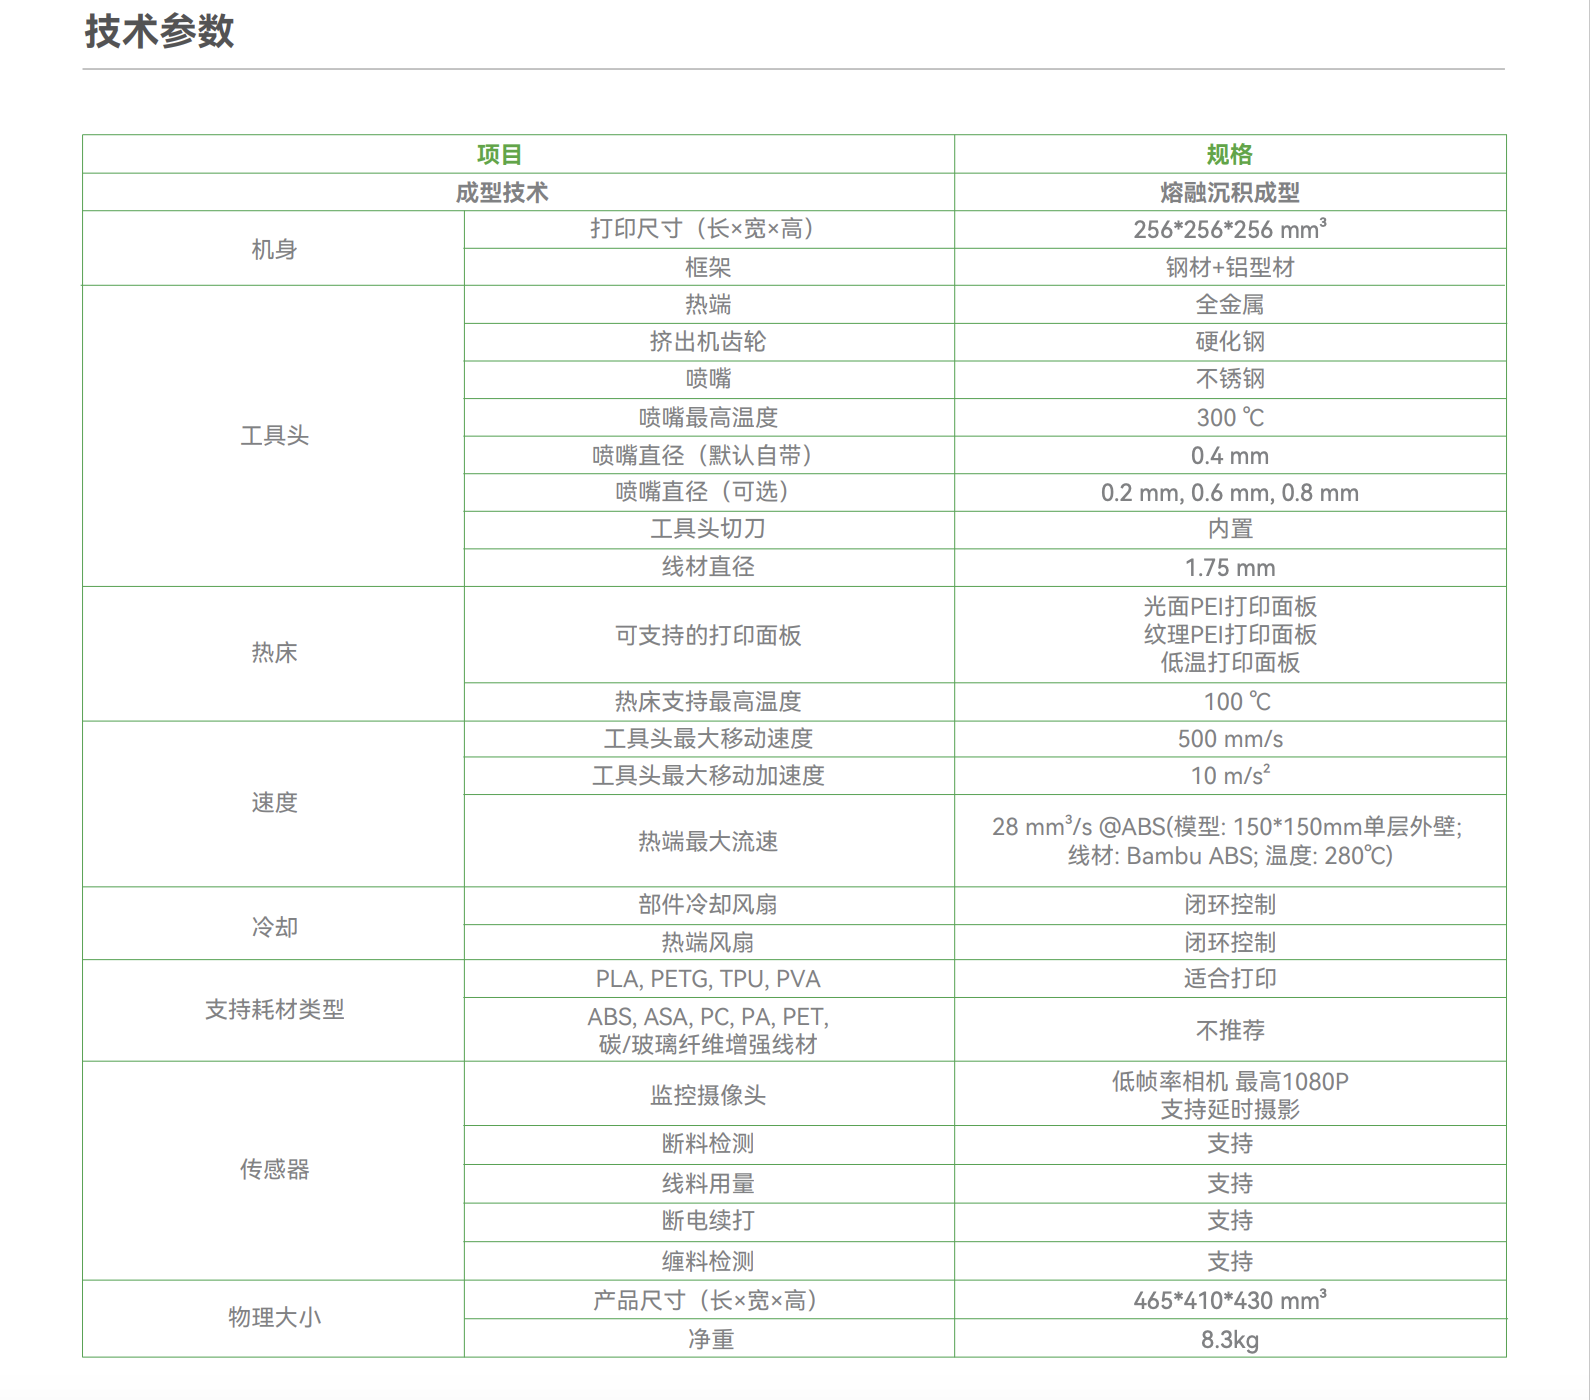
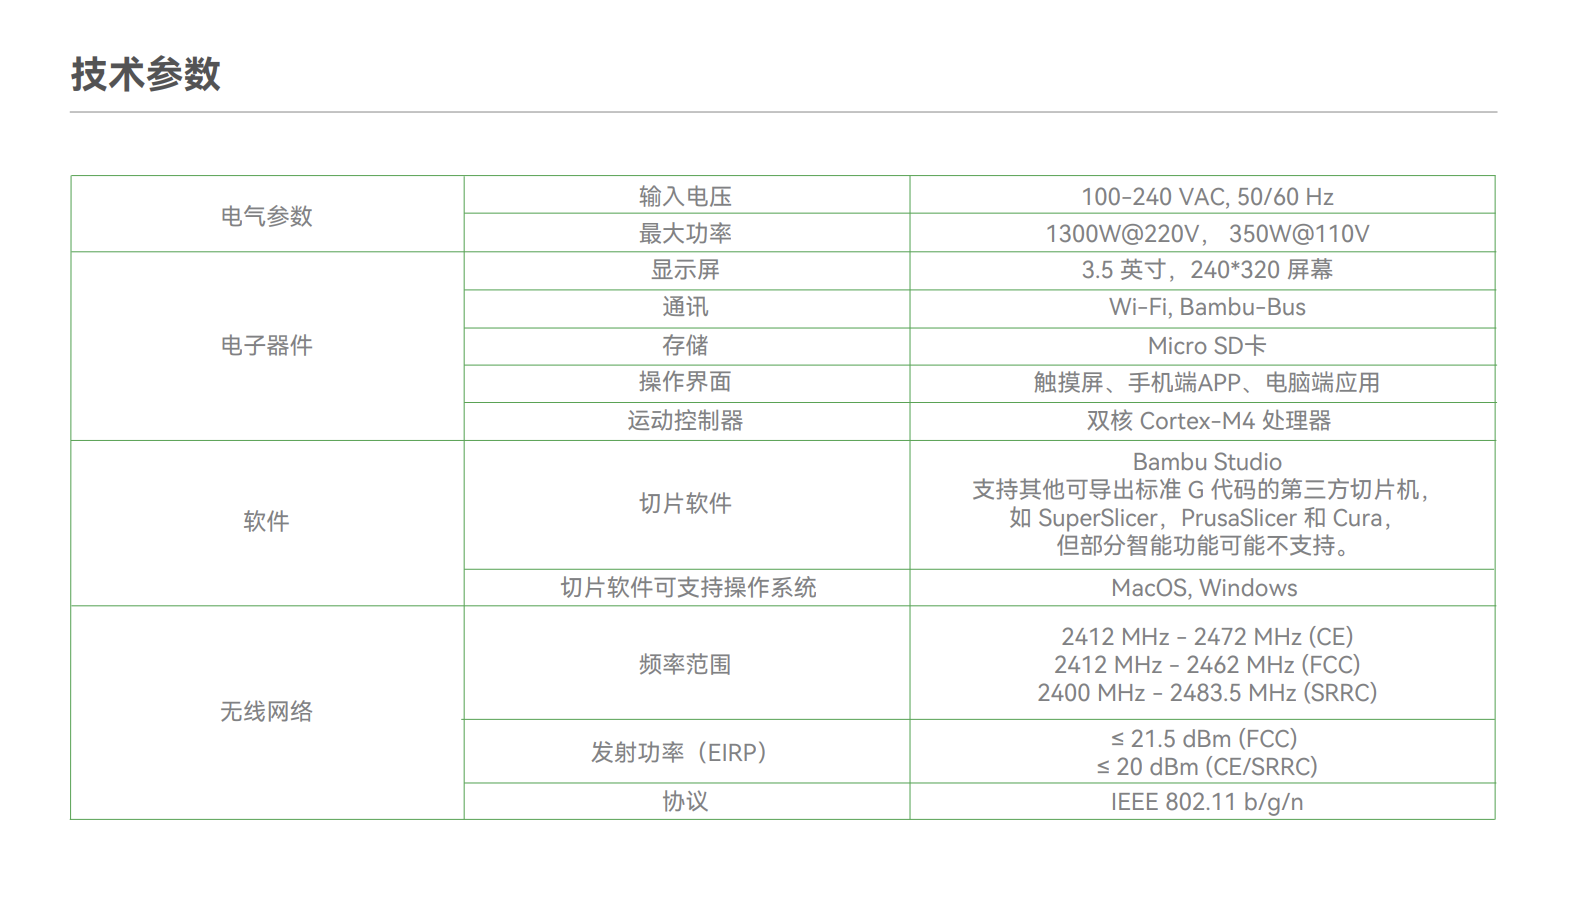
The Manual of Tuozhu A1
3D Design of Wheel
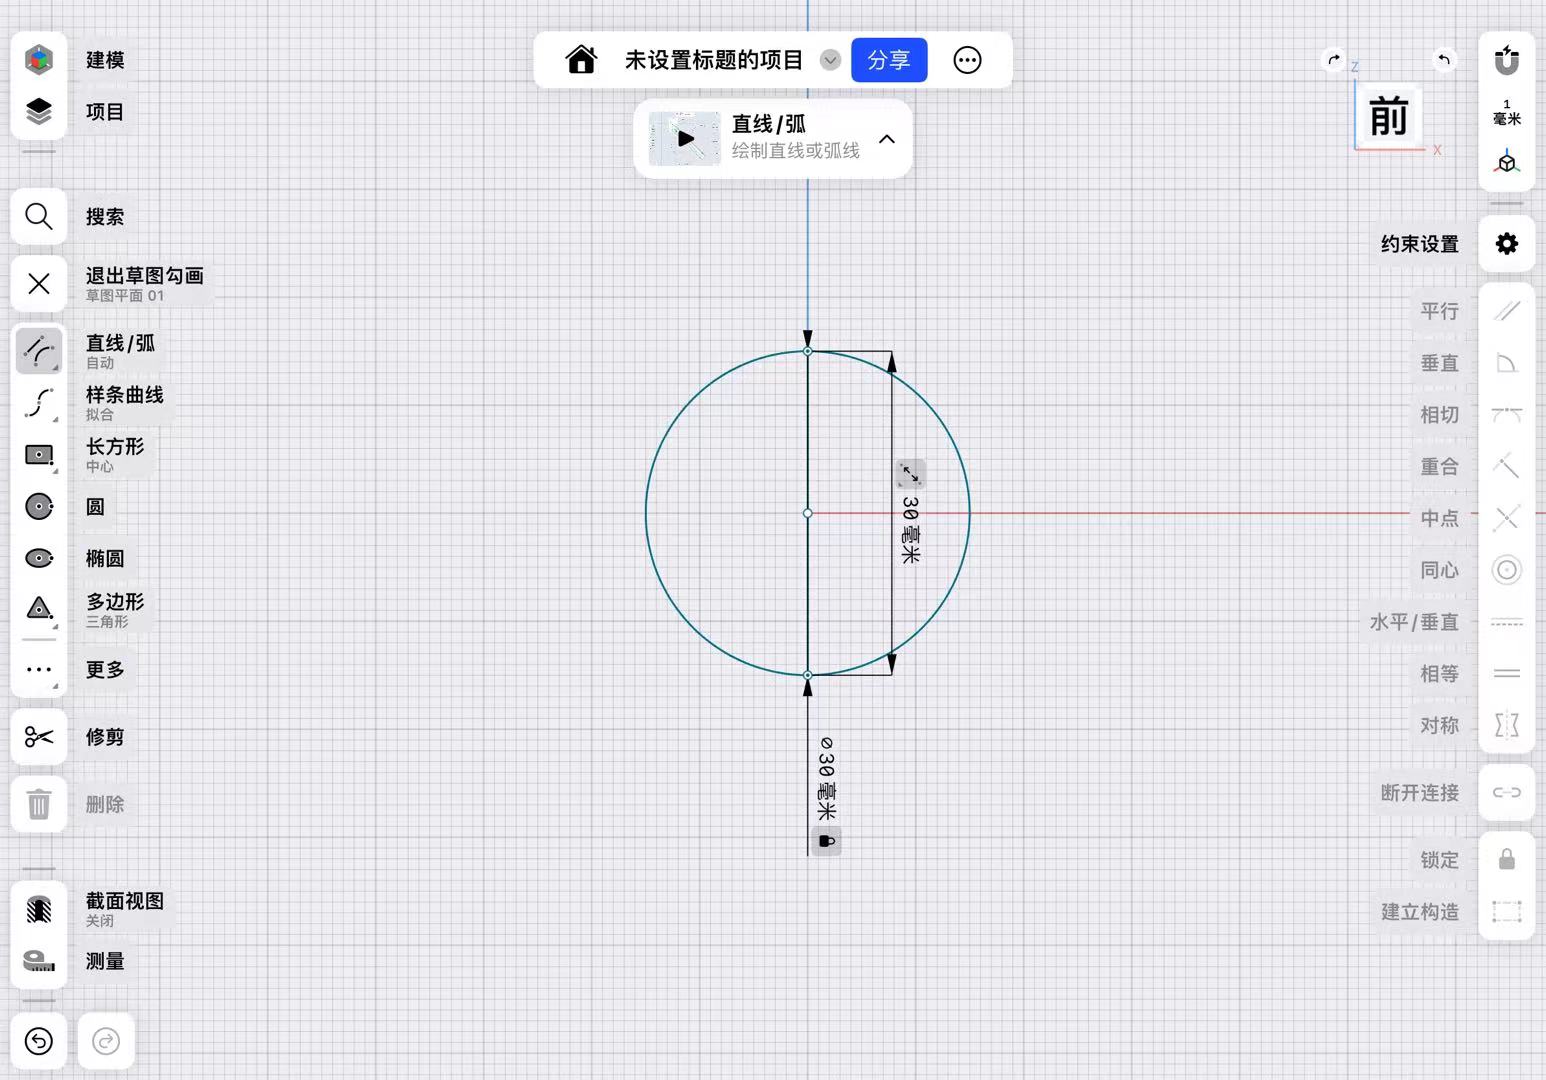
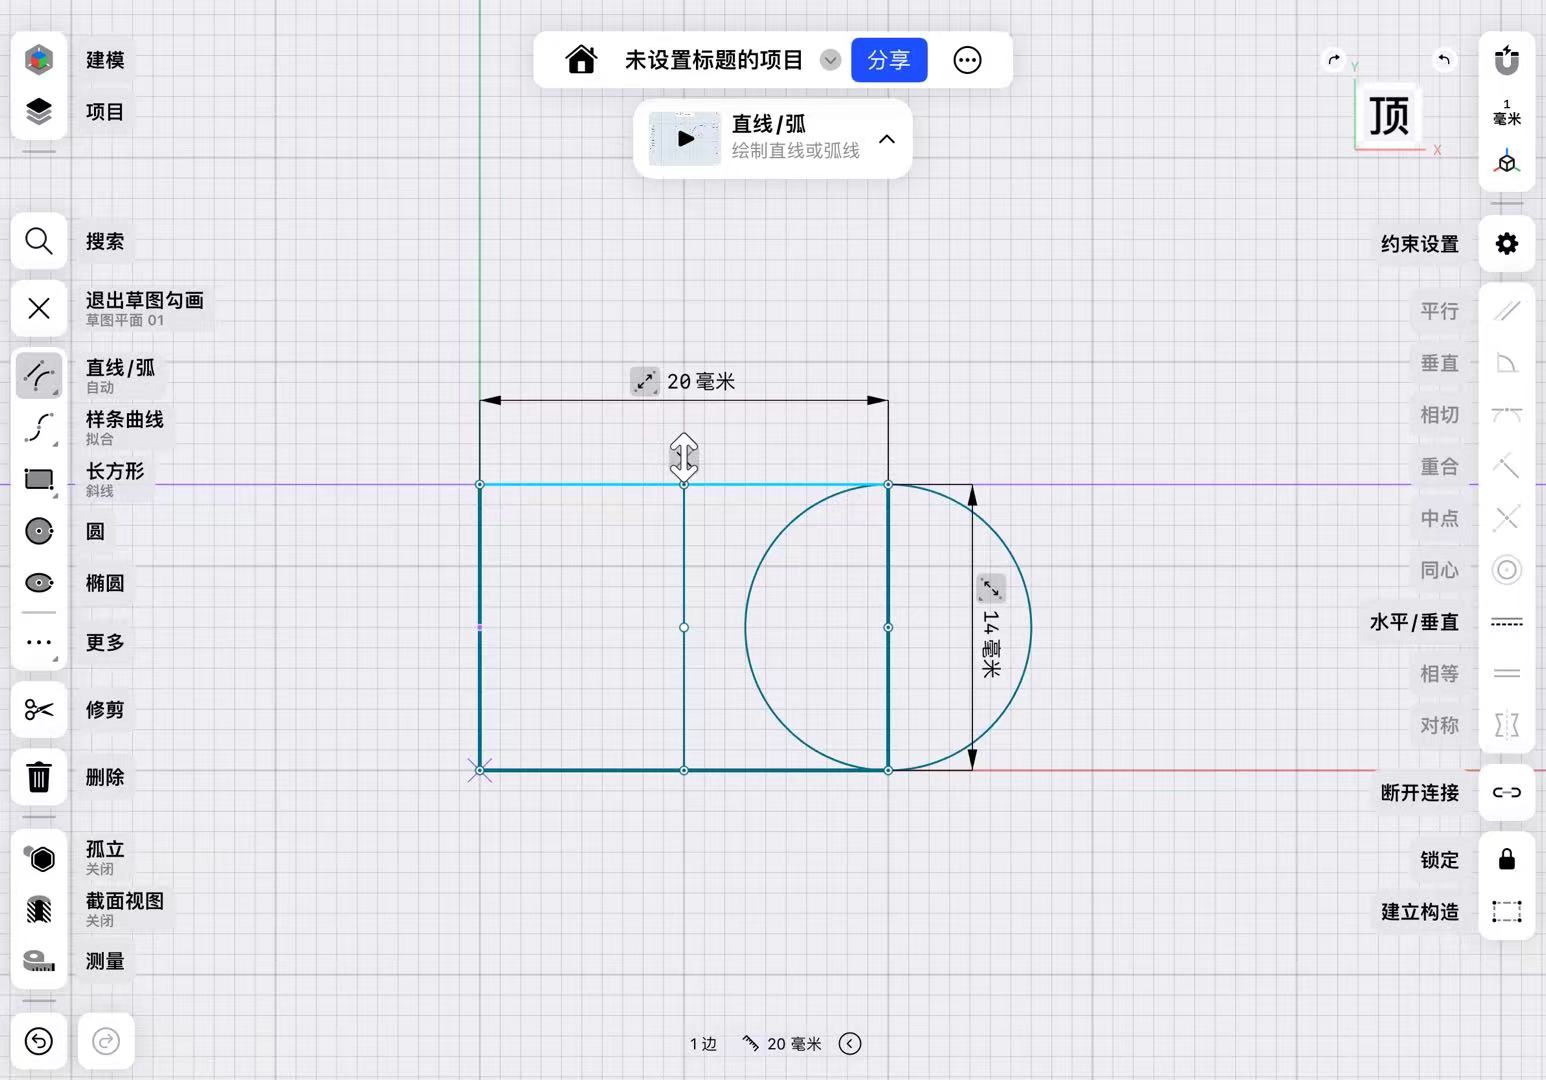
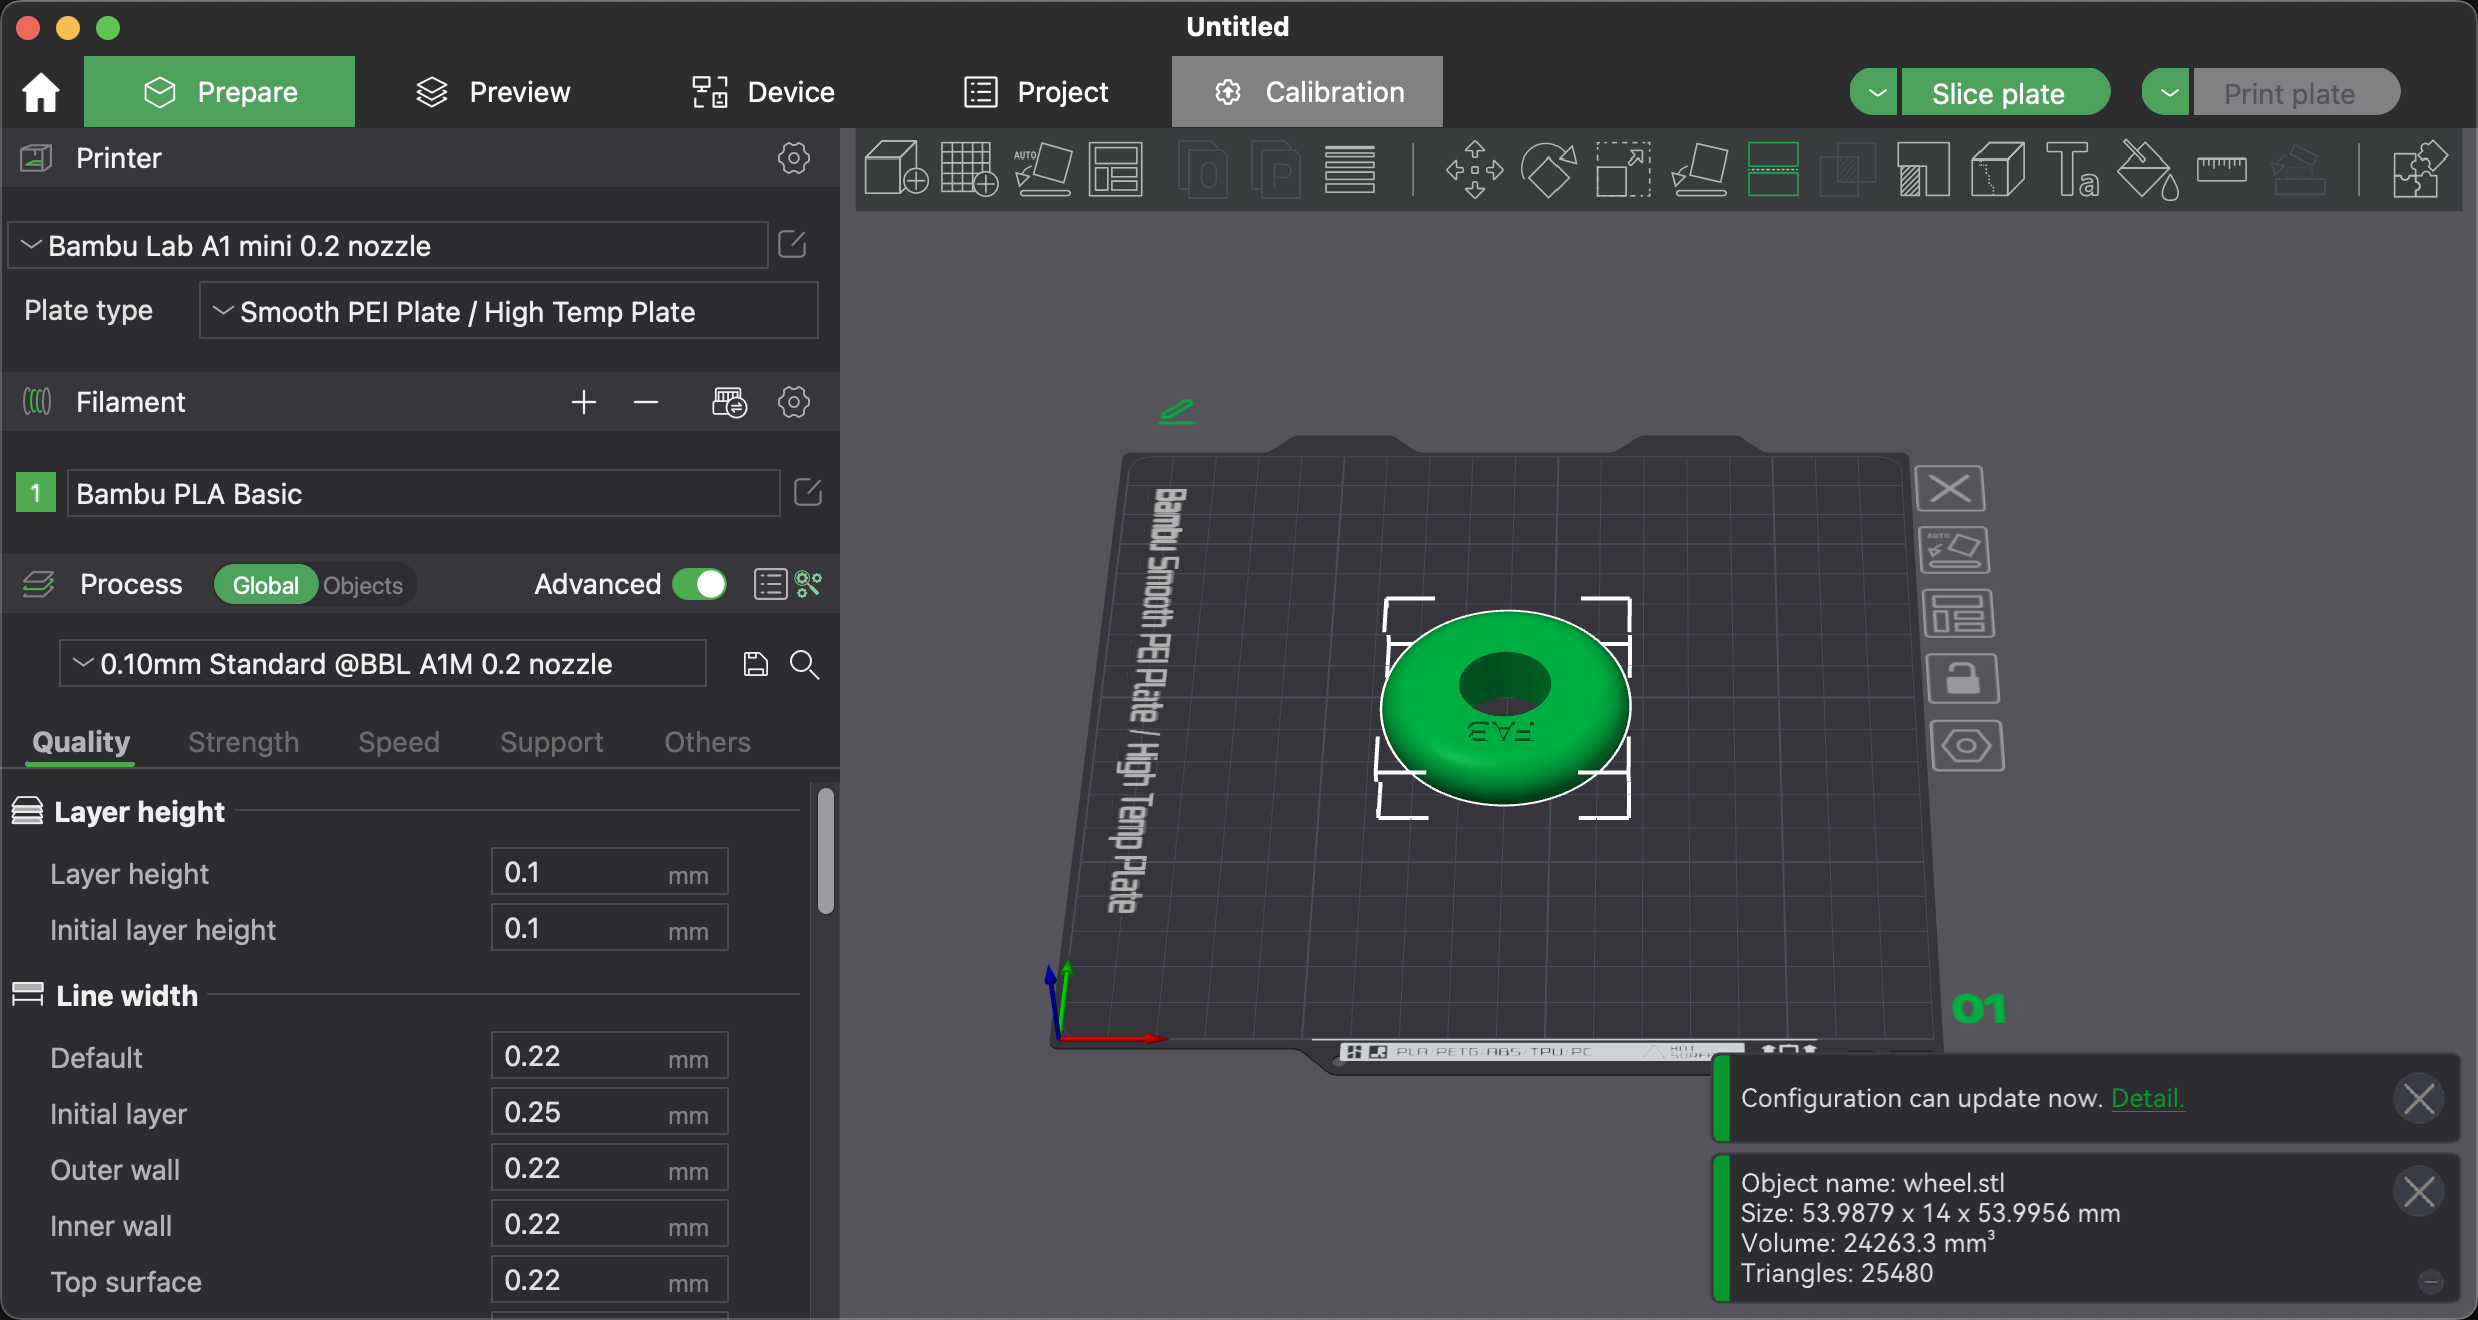
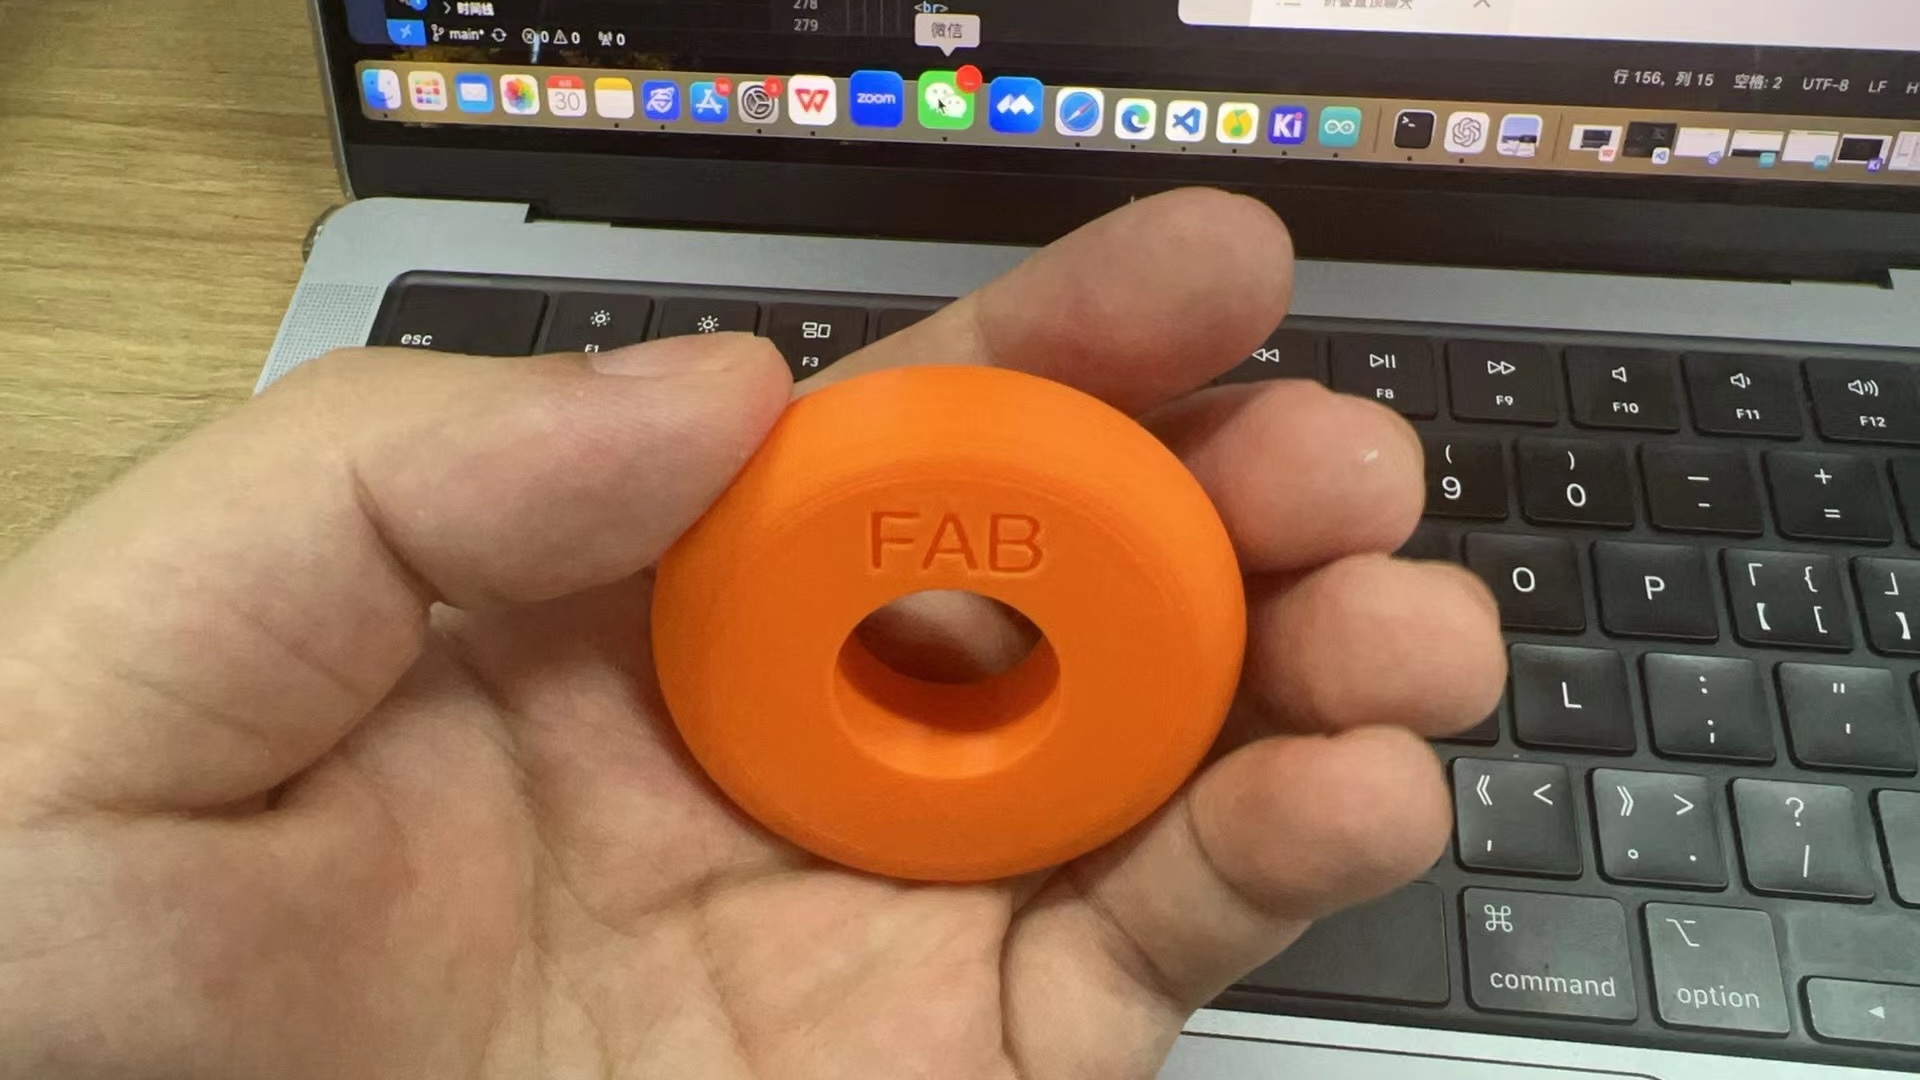
I first drew a circle, and then drew a rectangle along the diameter of the circle to create a sketch for the wheel I wanted to make.
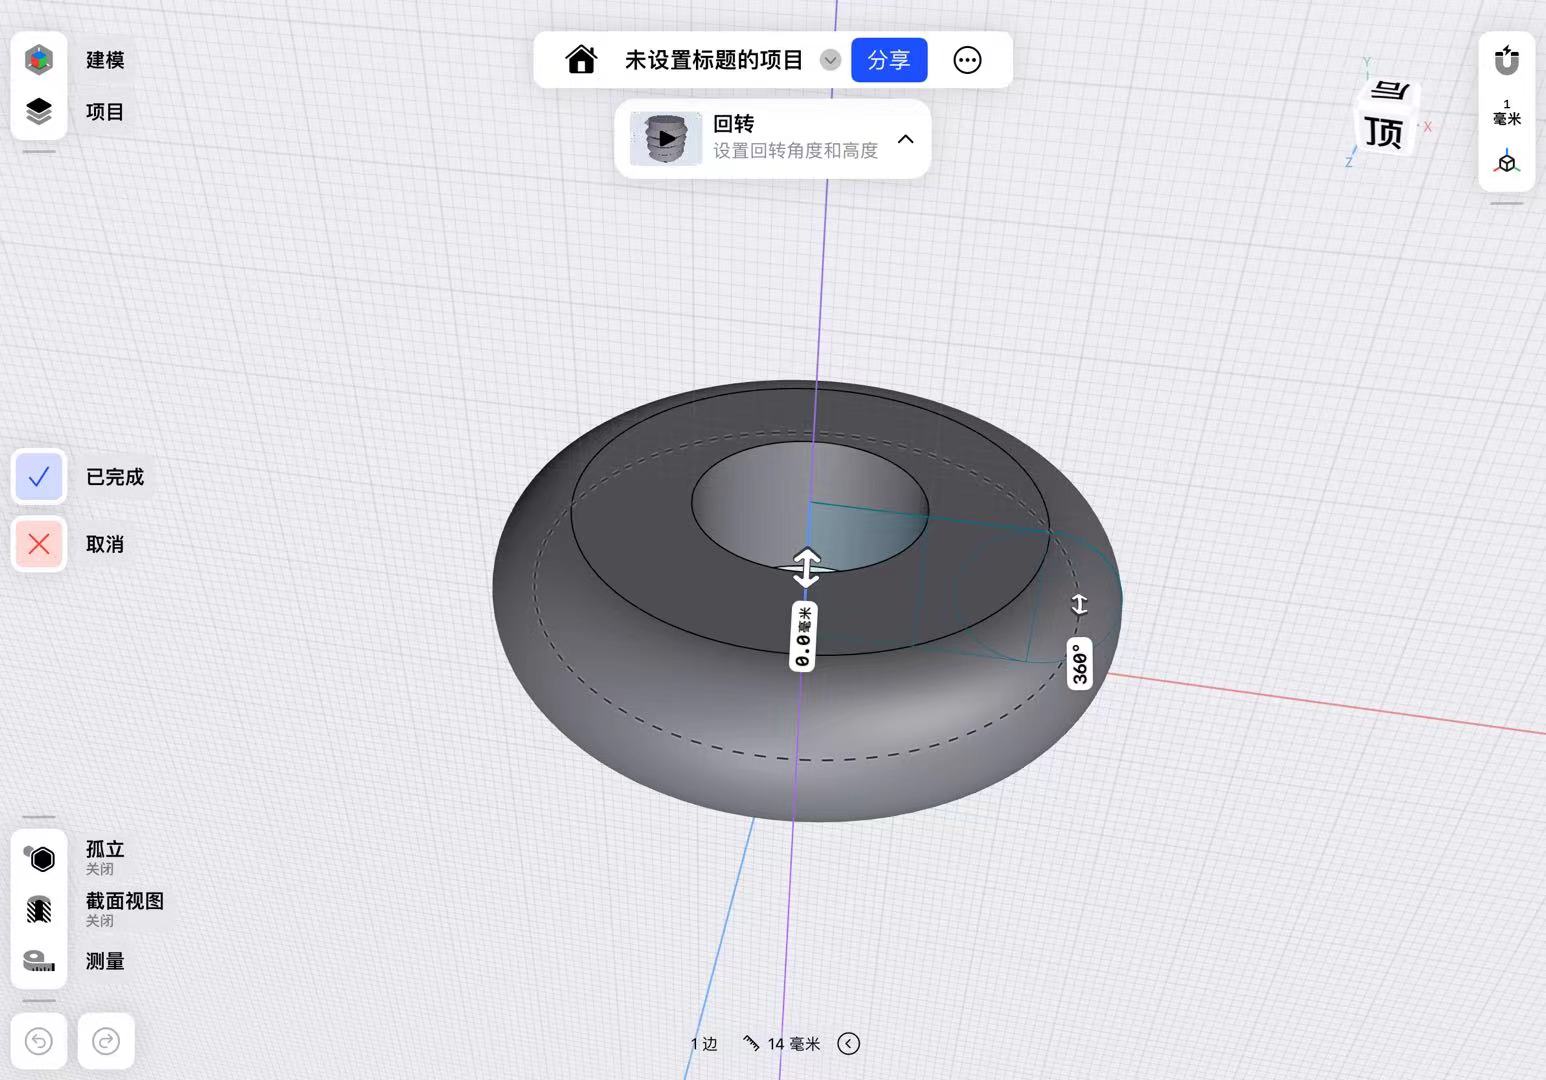
By using the revolve command, I obtained a torus.
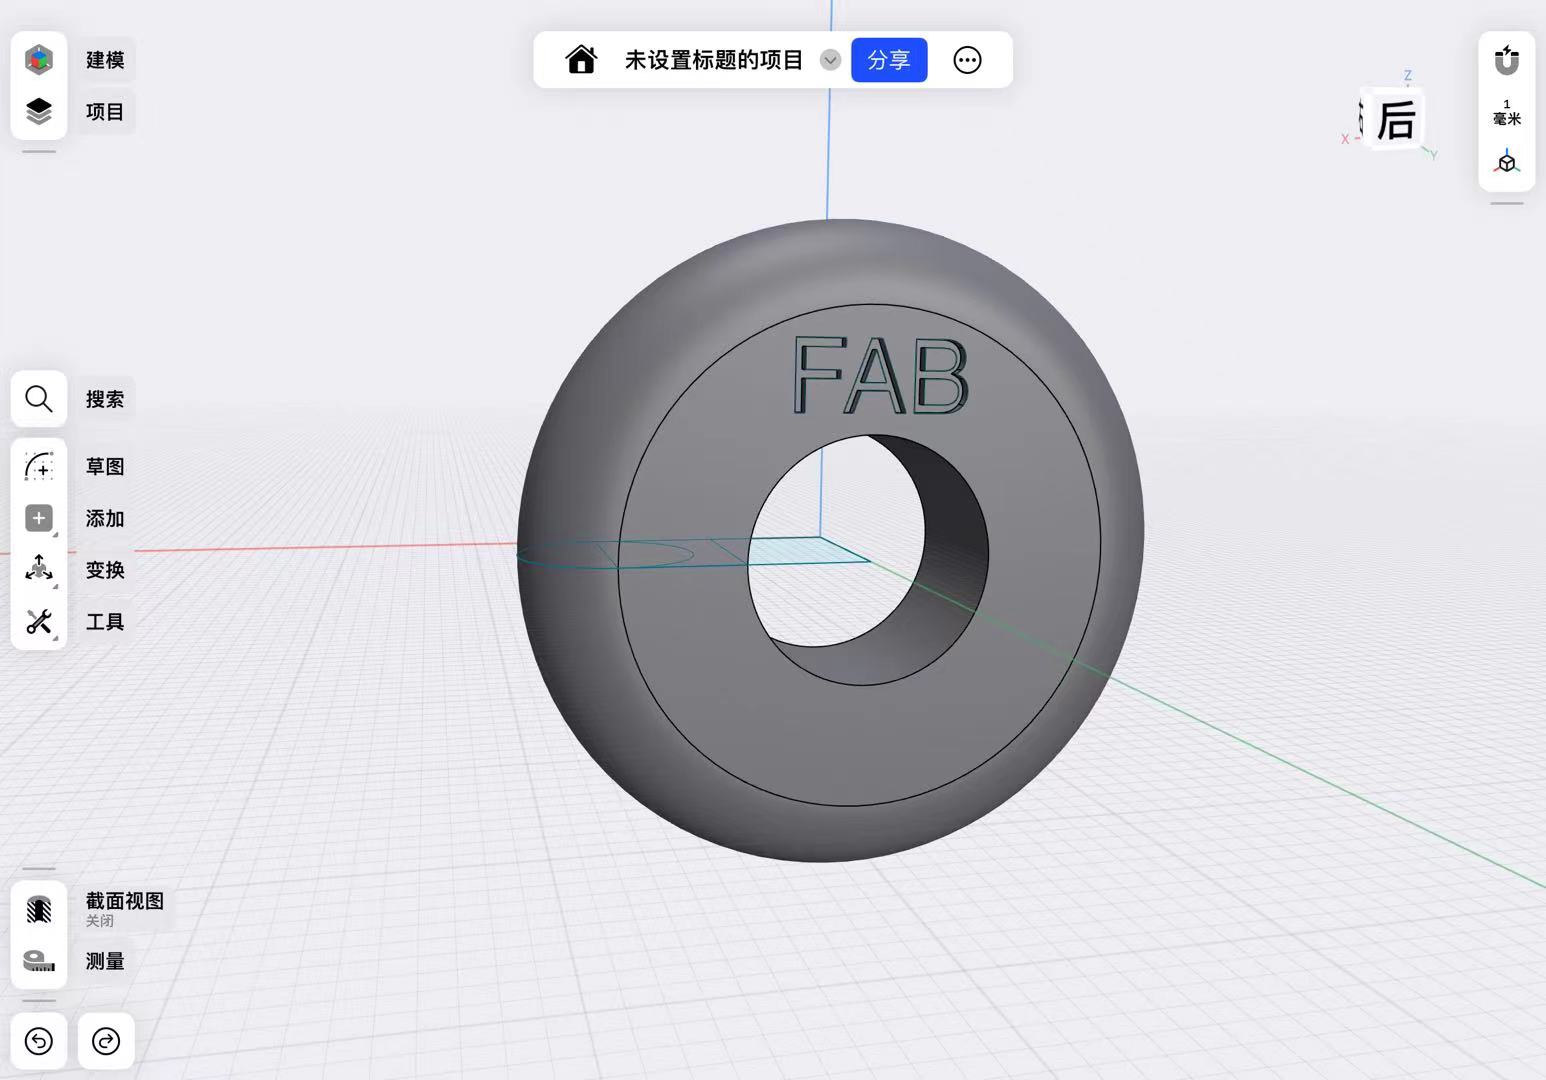
Finally, on the surface of the torus, I added the text "FAB" and achieved an indented effect by extruding and cutting out the letters.
Finally, I get the final design of the wheel.
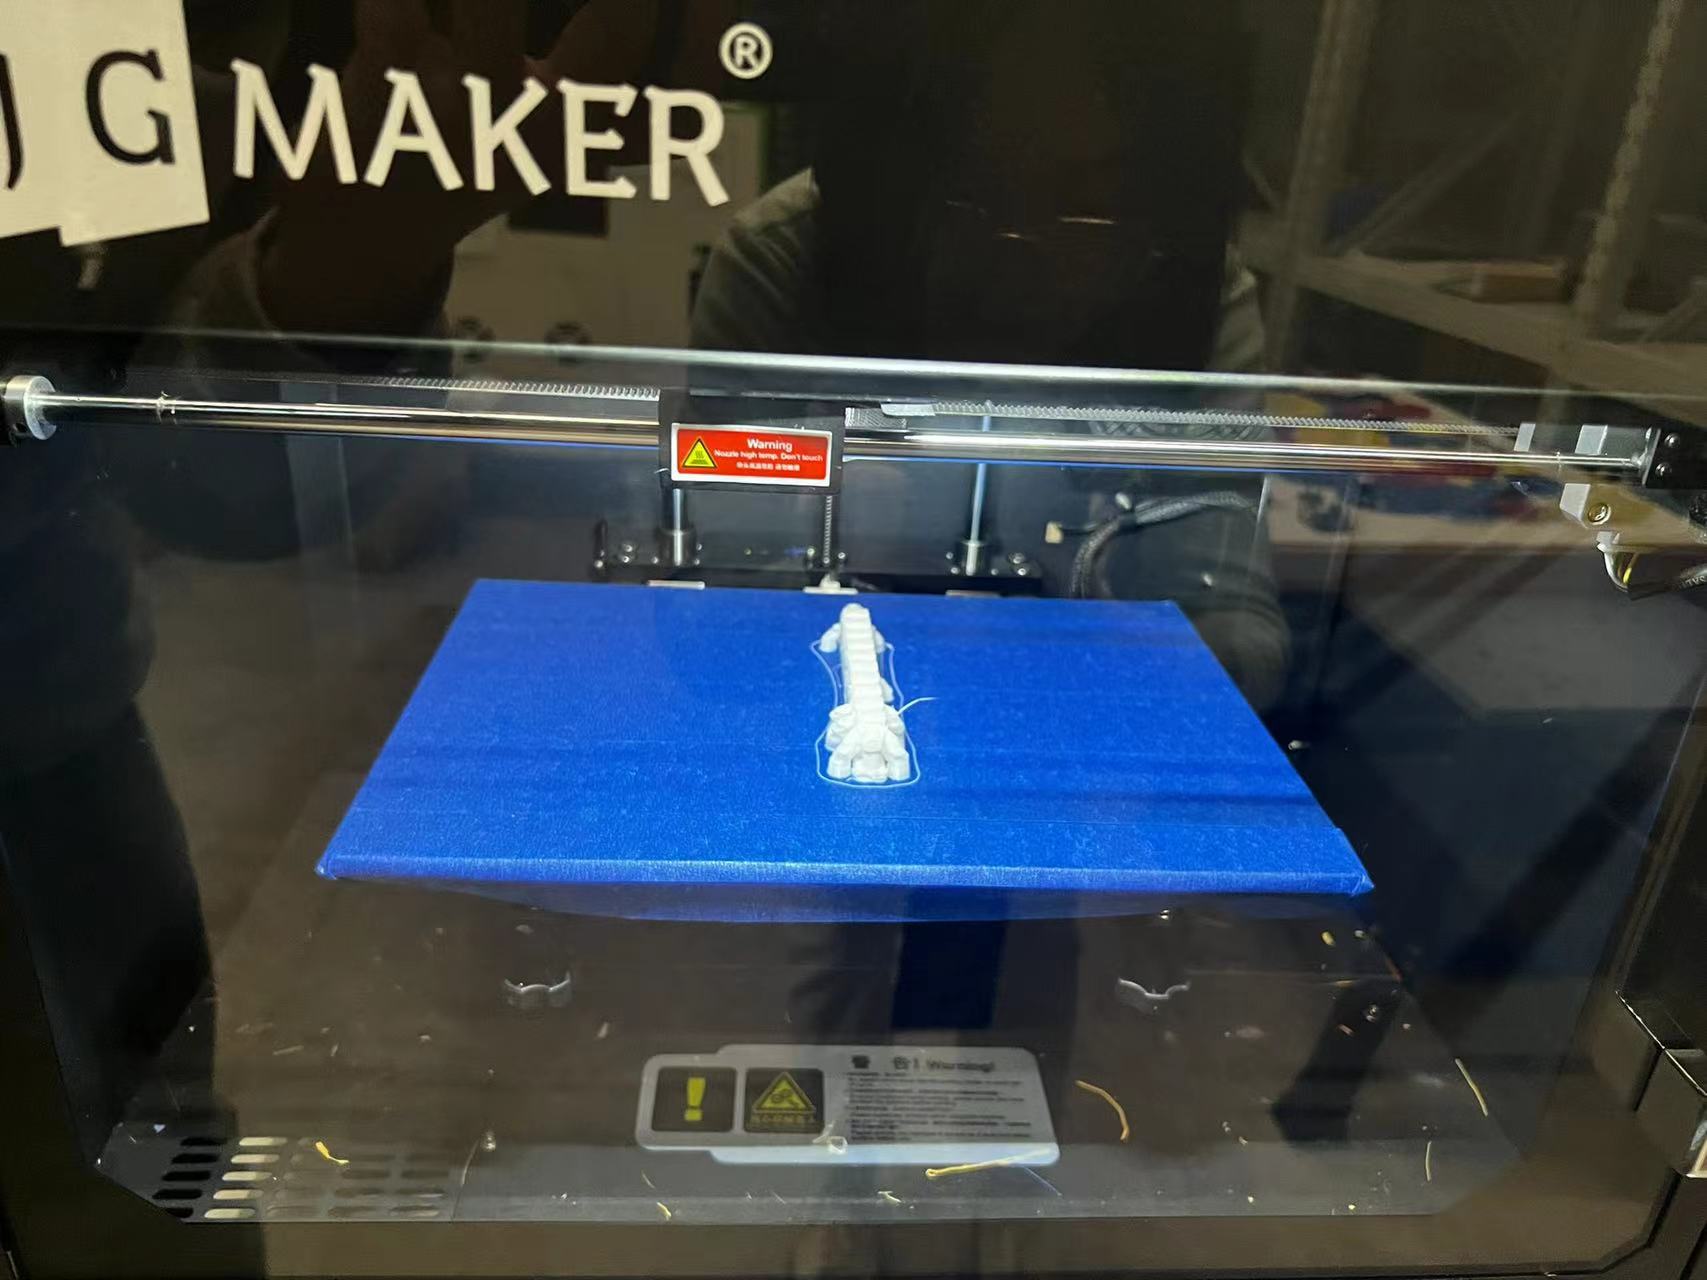
3D Printing of Wheel
I transferred the generated STL file to the slicing software that comes with the Tuozhu A1, started slicing, and began printing.
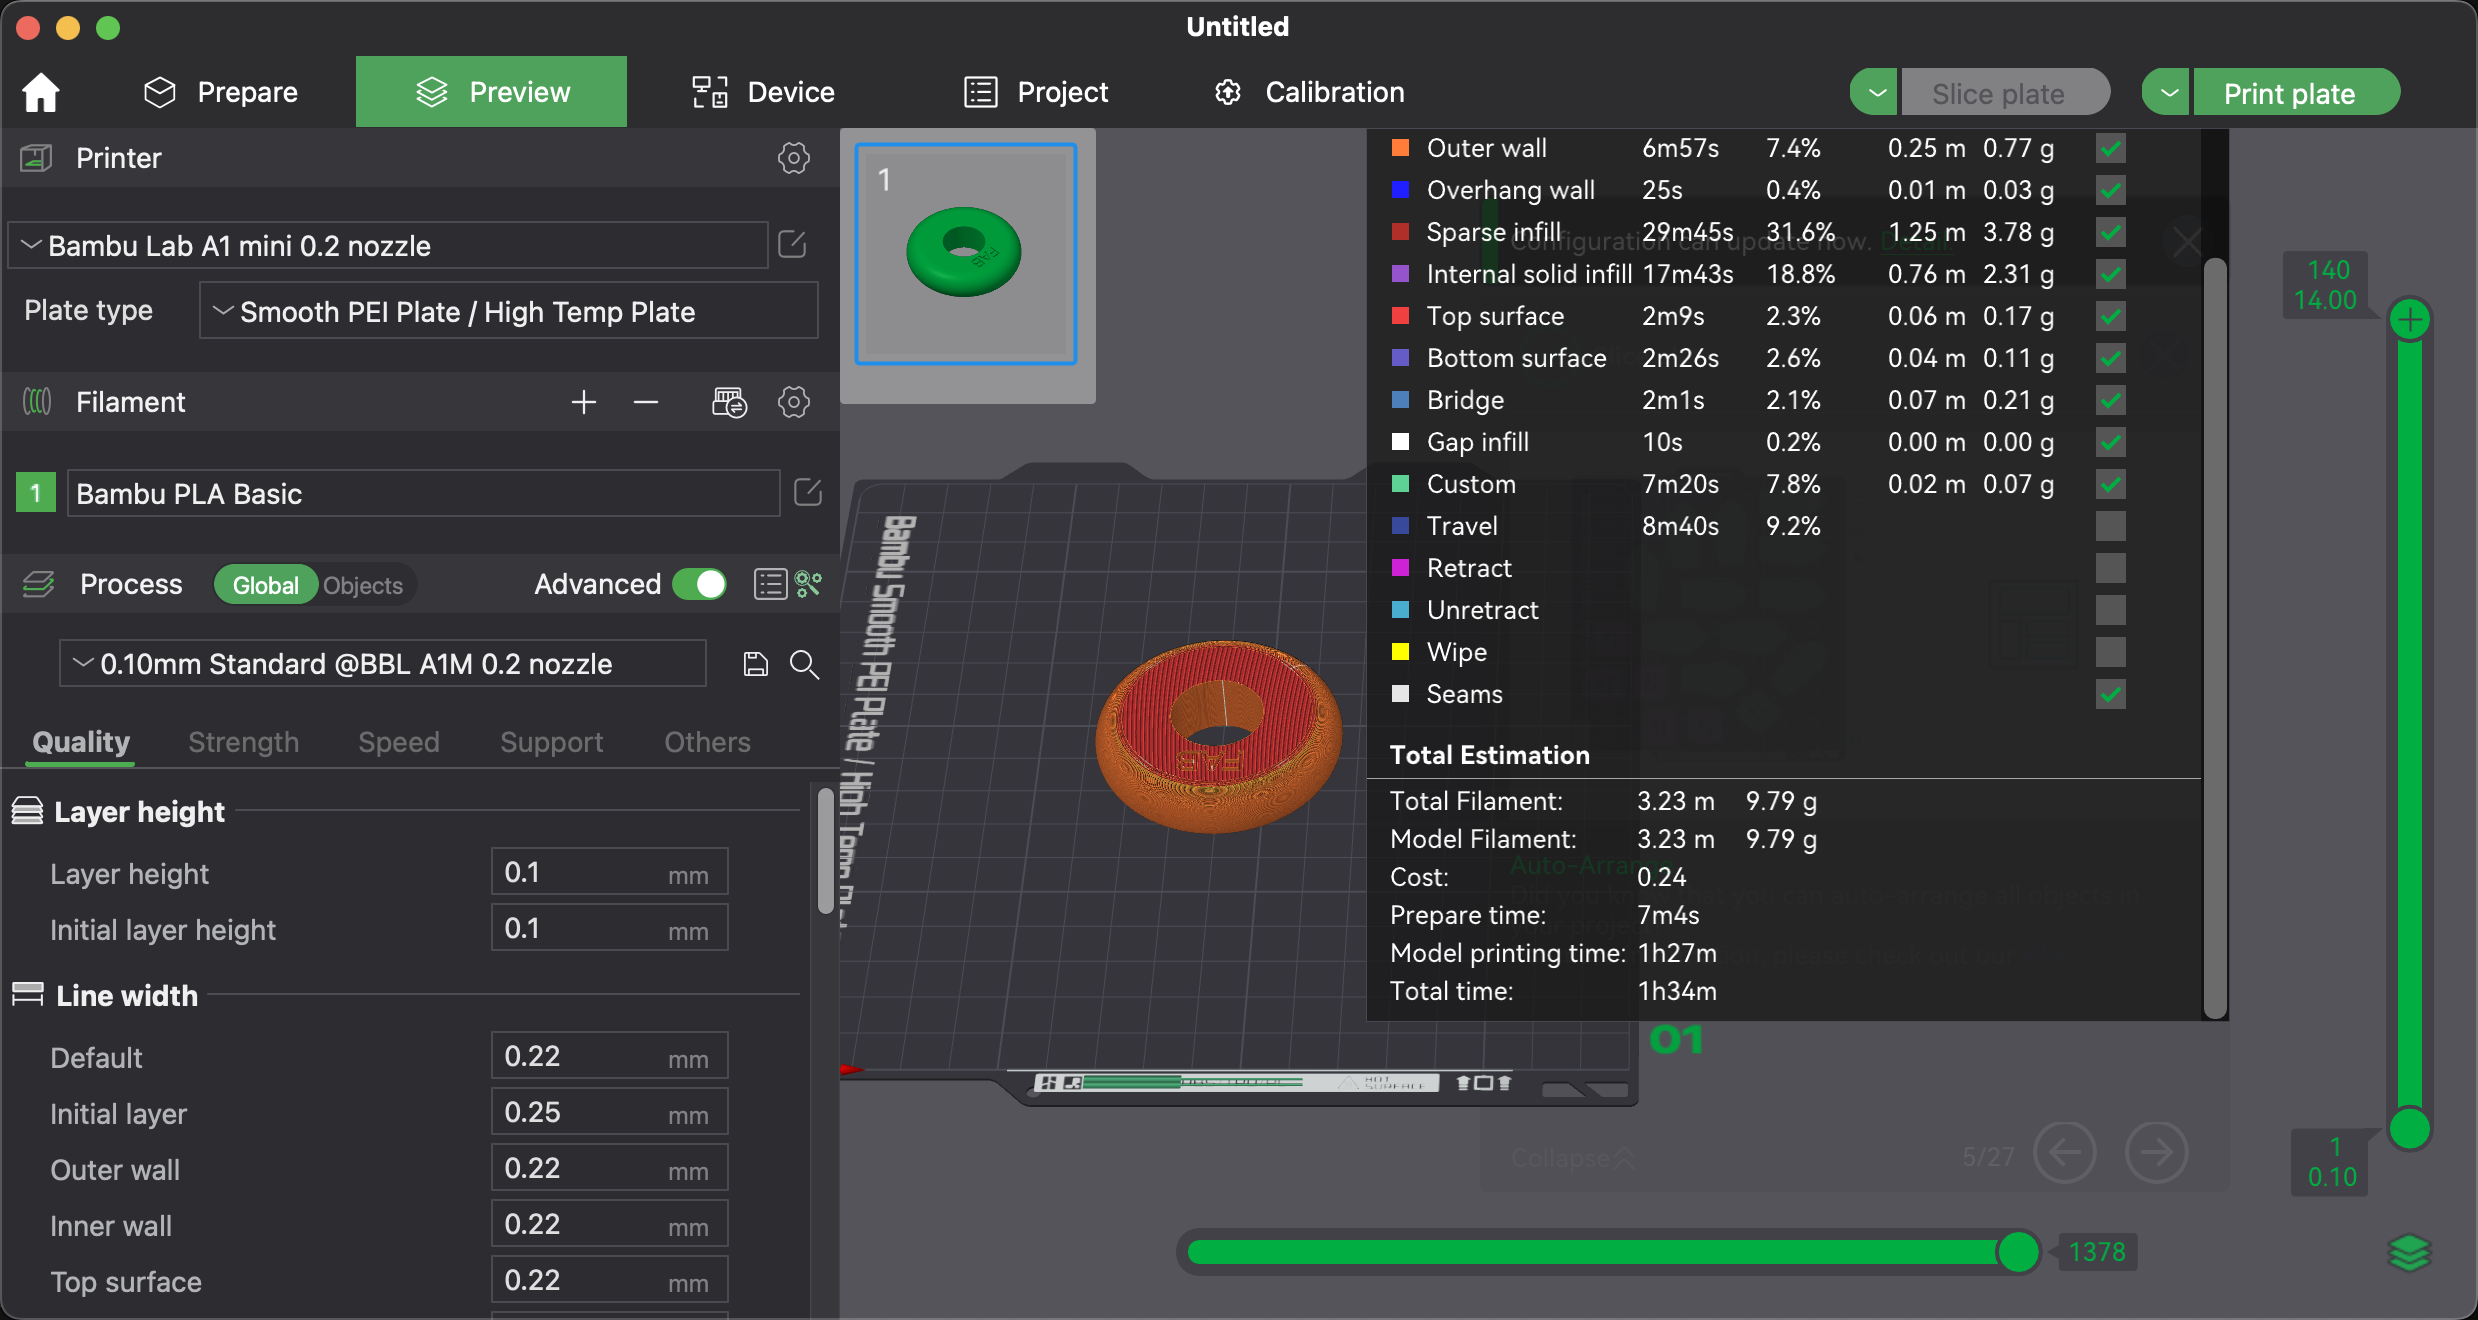
In the end, I got a 3D printed wheel.
Learning about Additive Manufacturing and Subtractive Manufacturing
It allows for the creation of complex shapes with minimal material waste and is ideal for prototyping and customized production.
It’s often used where high precision and smooth finishes are required.
Why the wheel is not made subtractively?
- This wheel structure requires the removal of the central hole, and the curved arcs on both sides also result in a significant waste of material.
It is more suitable for additive manufacturing.
- It is too small and complex to be made subtractively.
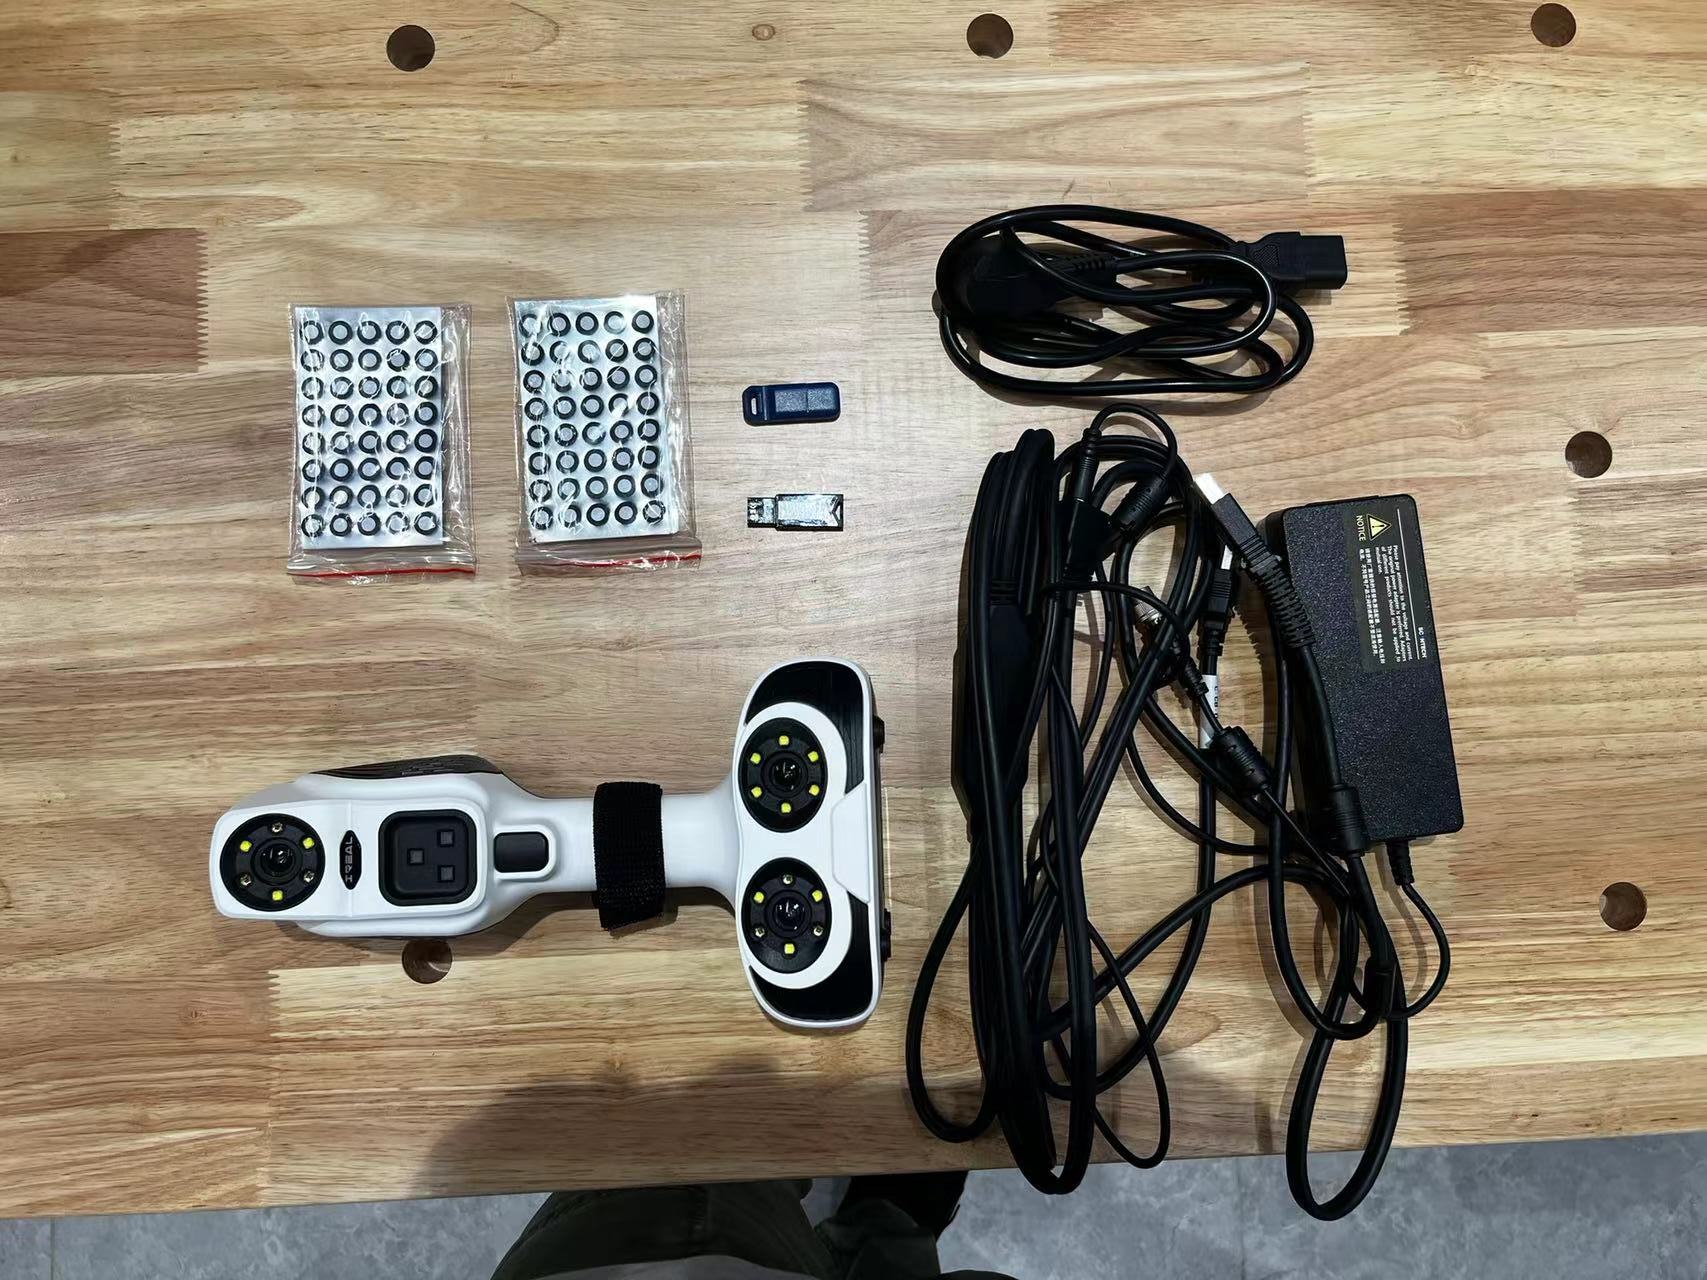
3D Scanning
Software and Machine instructions
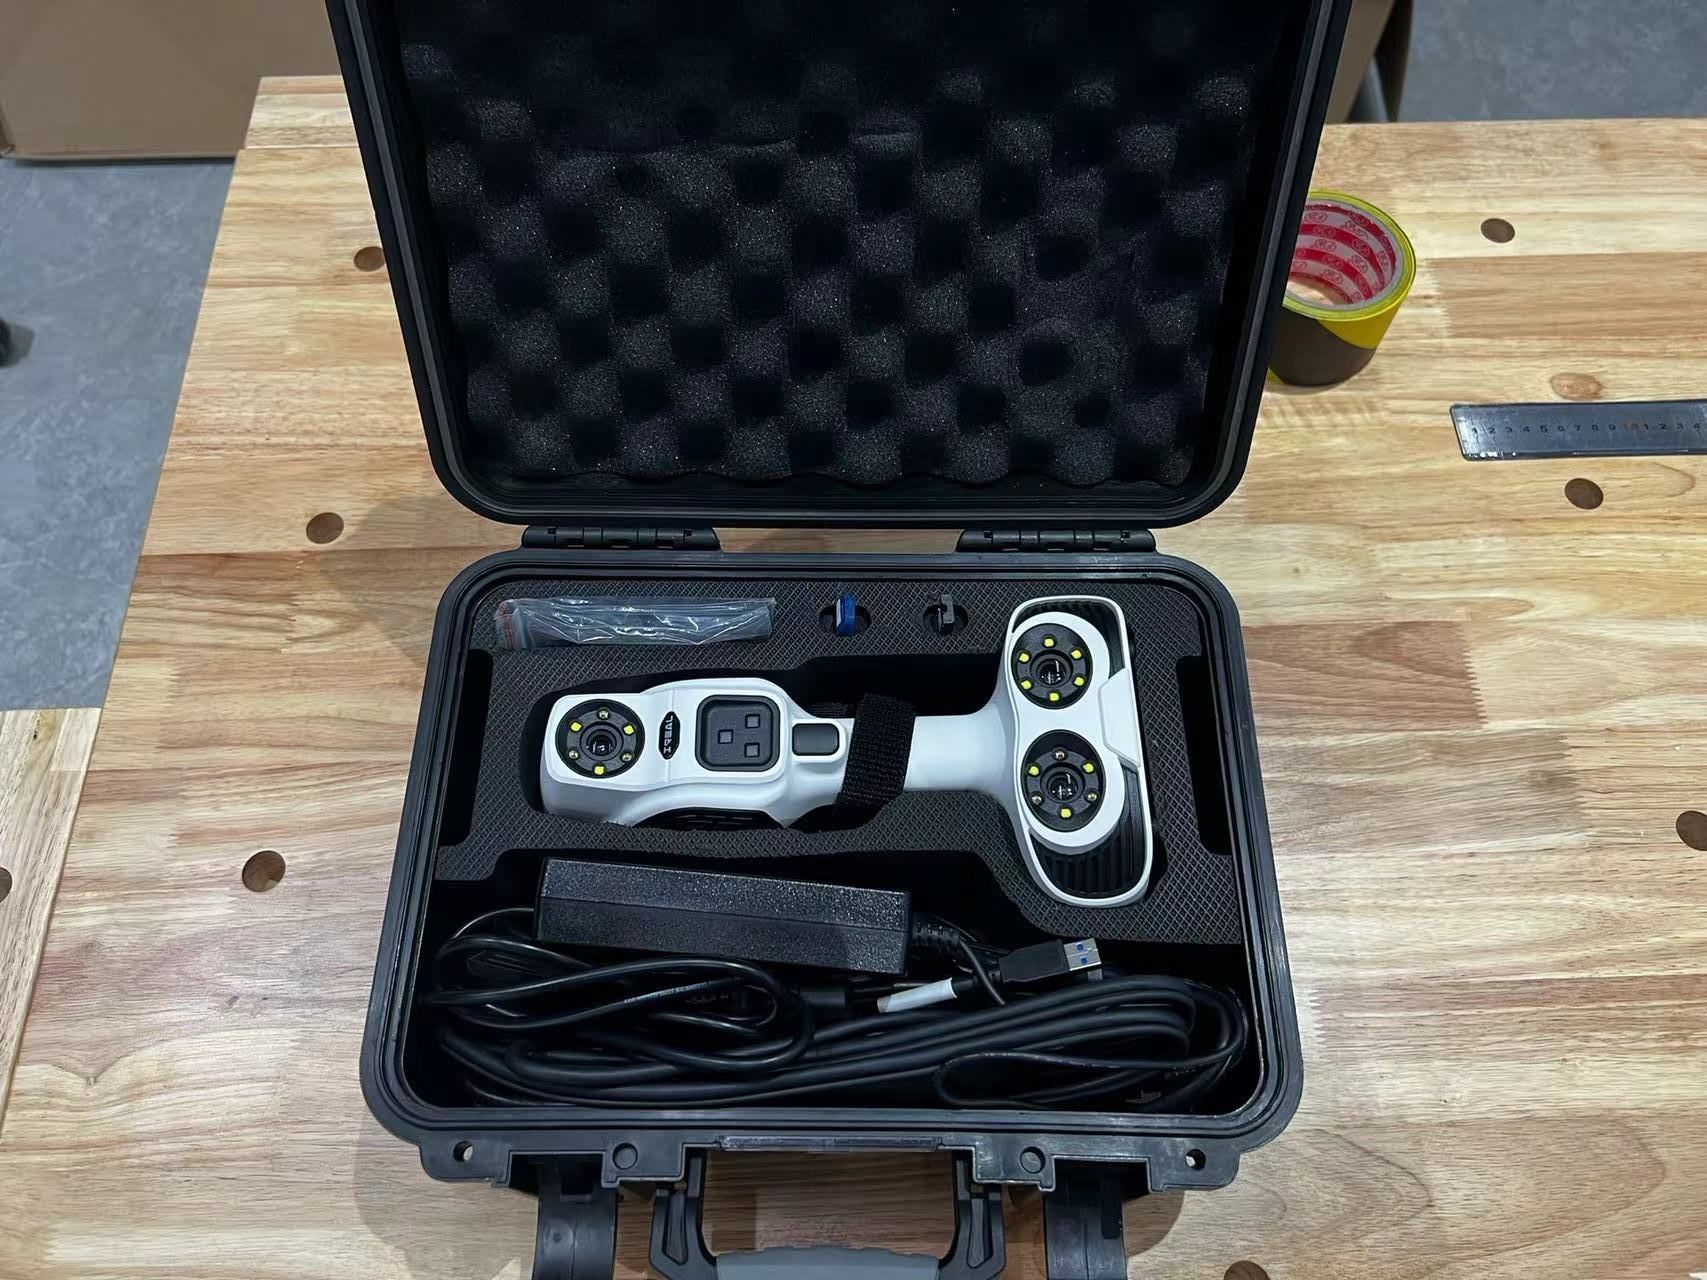
Software: iReal 3D:
iReal 3D is the accompanying software that enables the scanner to work and produce corresponding results.
Learn more about iReal 3D from its website: iReal 3D
iReal 3D User Manual
The iReal 2E 3D scanner from Scantech employs several advanced technologies to enhance its scanning capabilities.
Key among these is the use of **infrared VCSEL structured light technology**, which allows for the safe and comfortable scanning of objects, including human subjects.
This technology is particularly effective because it does not require physical contact with the object being scanned and is capable of capturing high-resolution texture details quickly.
Another significant feature is the scanner's ability to operate without markers.
This is enabled by its sophisticated algorithms, which allow for **feature-based, texture-based, and mixed alignment** modes.
These modes facilitate the scanning of objects with varied geometric and textural features, making the scanner versatile across different scanning scenarios.
Additionally, the iReal 2E is designed for user-friendliness, featuring a large field of view (580 mm x 550 mm) and a deep depth of field (720 mm), which contribute to its ability to scan medium to large-sized objects efficiently.
Its **data collection speed is impressive**, reaching up to 1,200,000 points per second, which ensures rapid and accurate 3D model creation.


Learn more about iReal 3D from its website: iReal 3D
iReal 3D User Manual
3D Scanning a chair
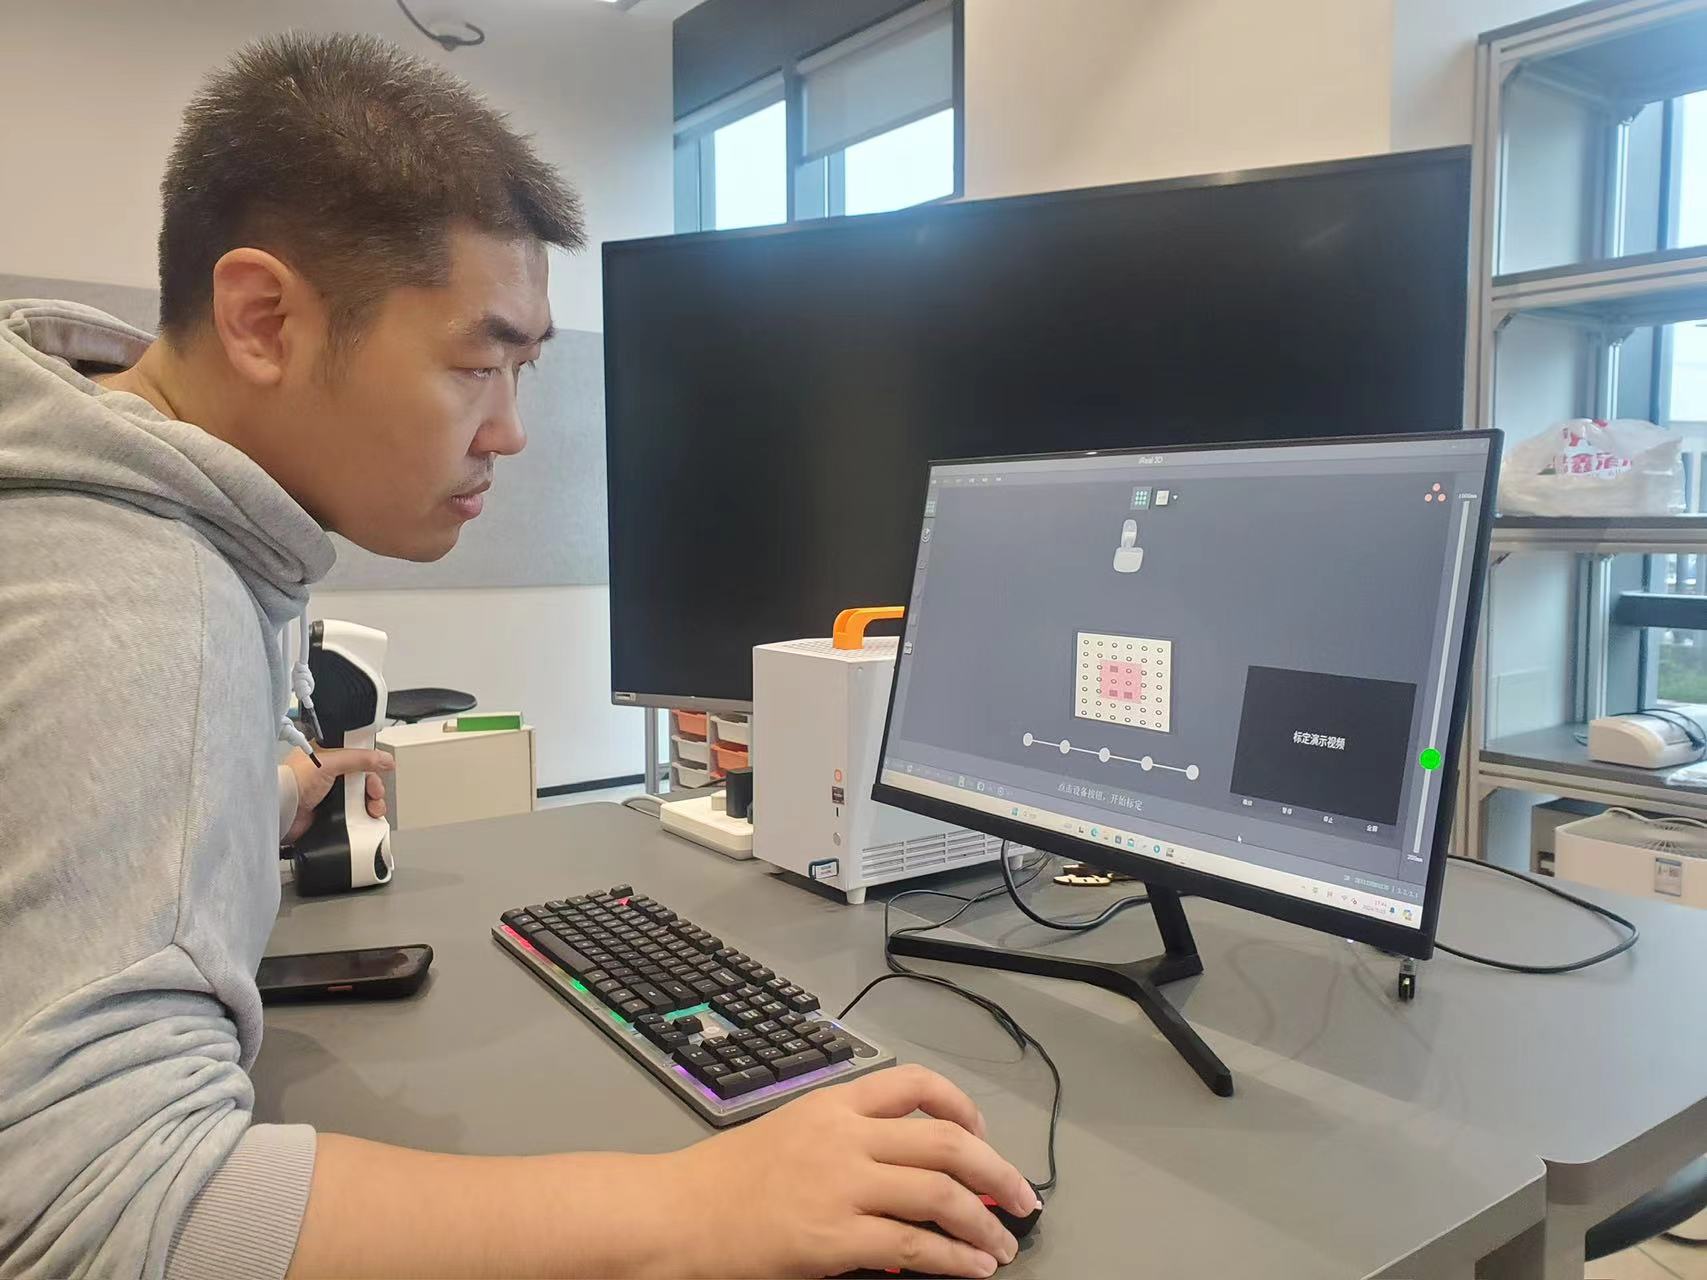
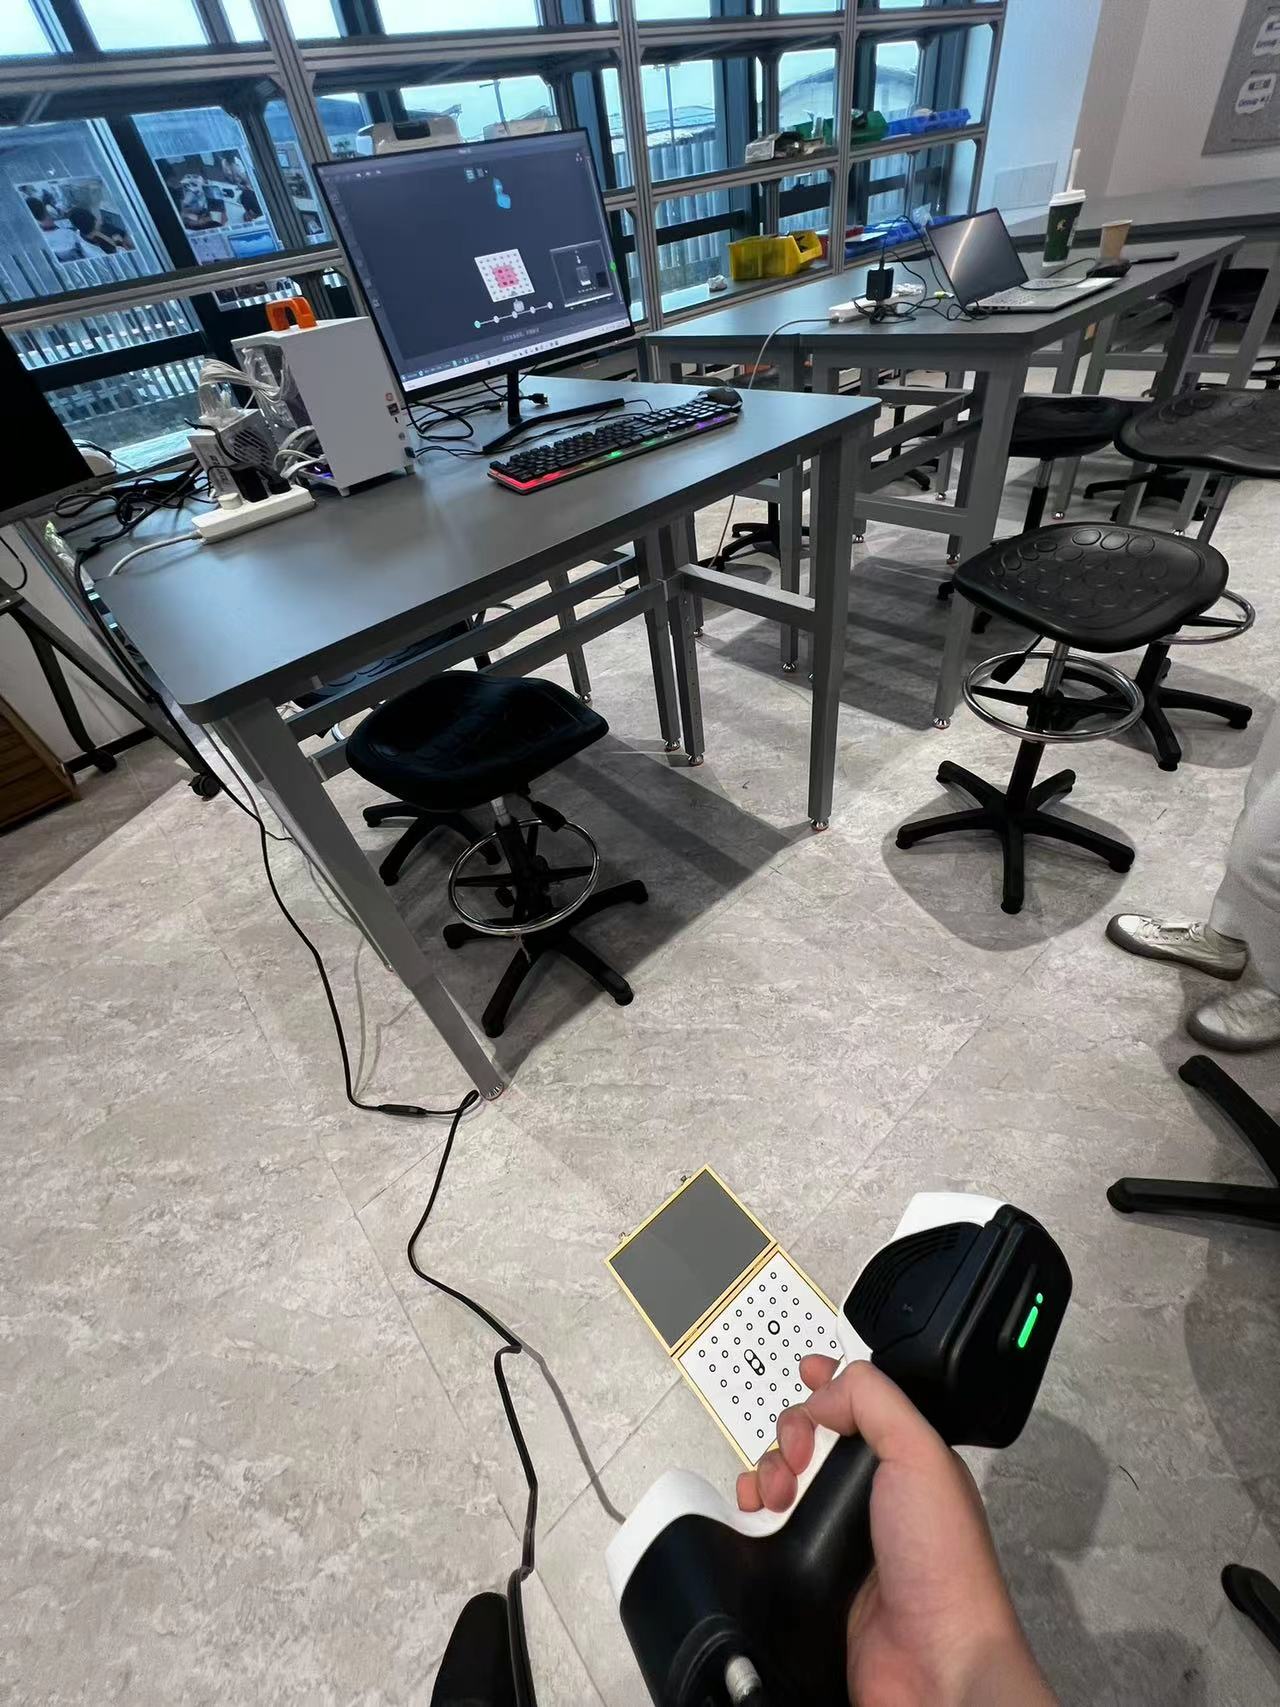 To use the iReal 3D Scanner effectively, follow these streamlined steps:
1. Setup: Install the scanner and connect it to your device. Place the object on a stable, well-lit surface without obstructions.


2. Scanning:
- Open the scanner software and calibrate the scanner if necessary.
- Select the appropriate scan mode and start scanning by moving the scanner around the object to capture all angles.
- Ensure even speed and distance for consistency.
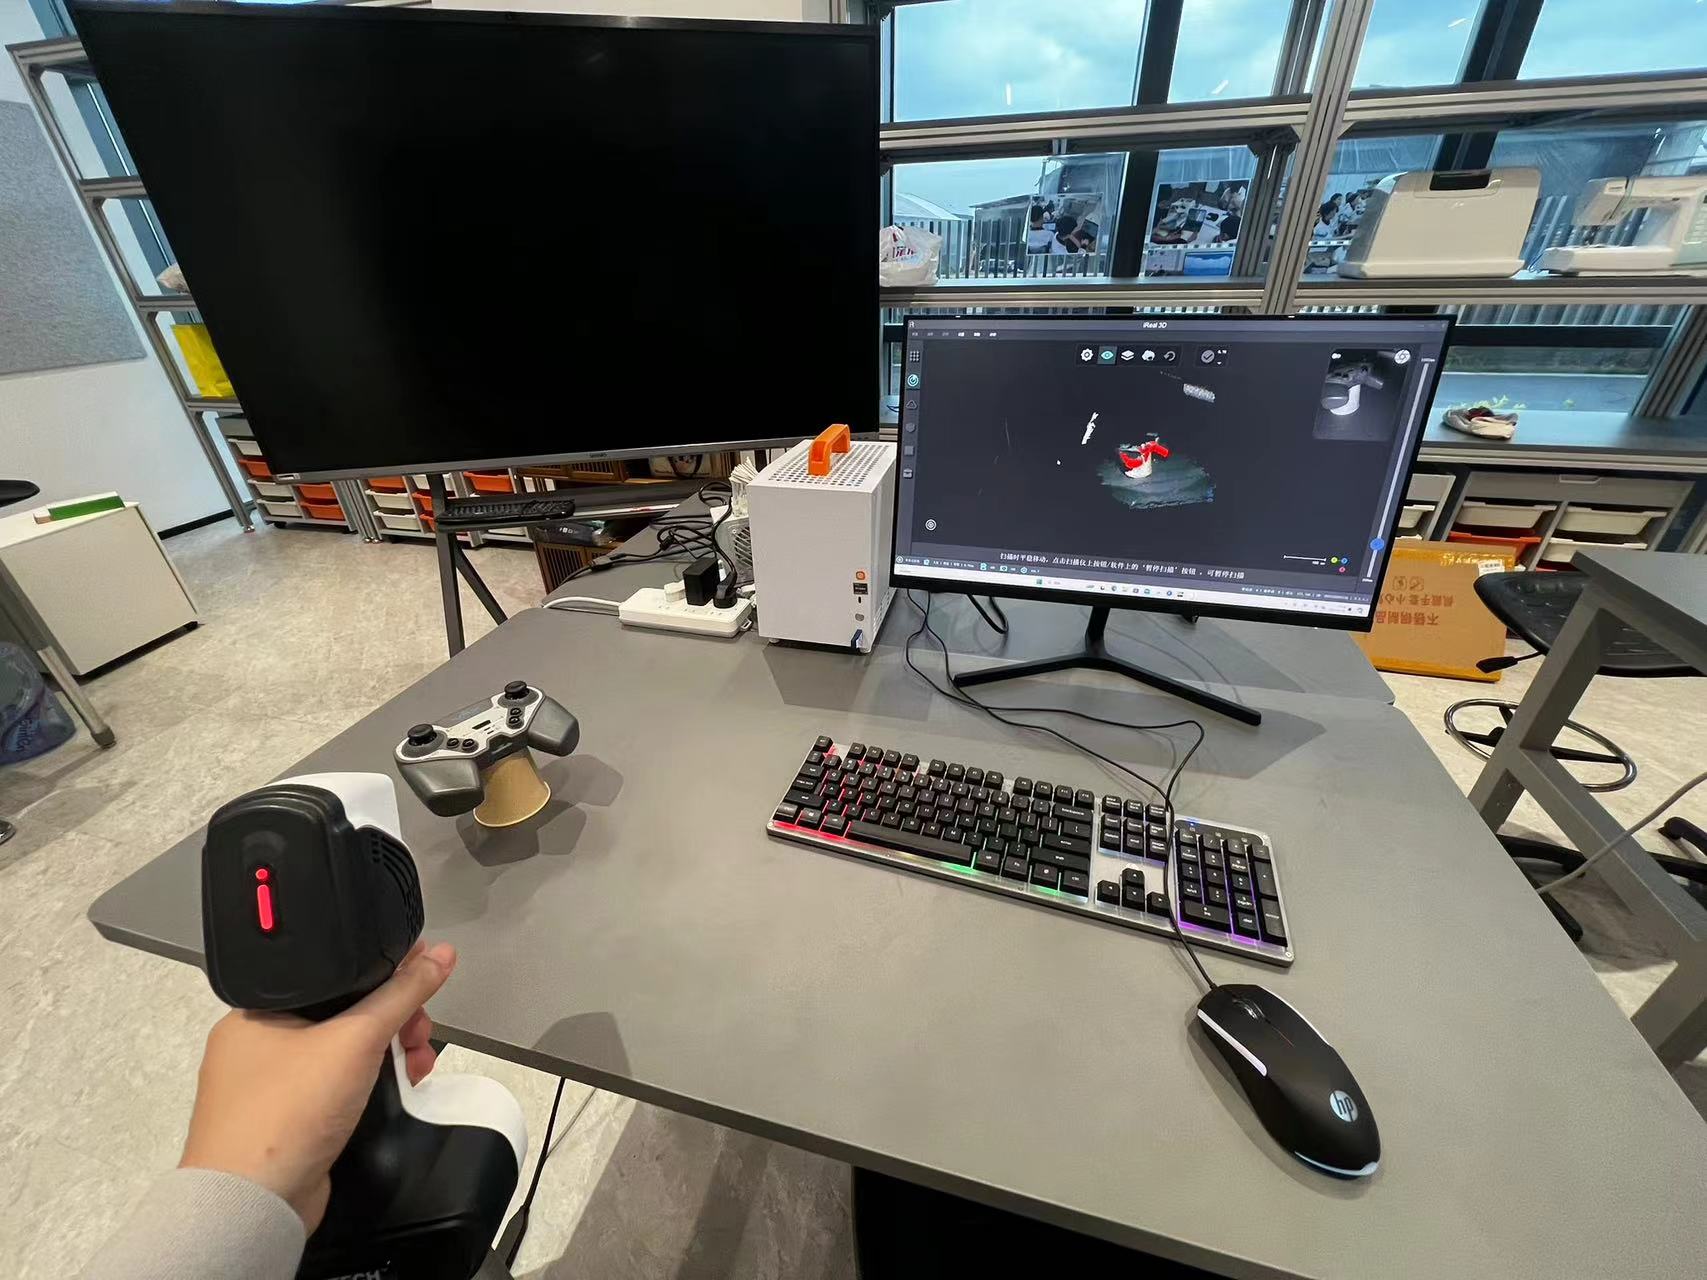
3. Post-Processing:
- Review and edit the model using the software, smoothing surfaces and removing artifacts as needed.
- Export the final 3D model in formats like .obj or .stl.
Tips:
- Maintain good lighting and stability.
- Keep the environment clean to avoid interference.
- Follow specific instructions from your scanner’s manual for optimal results.
Final Result:
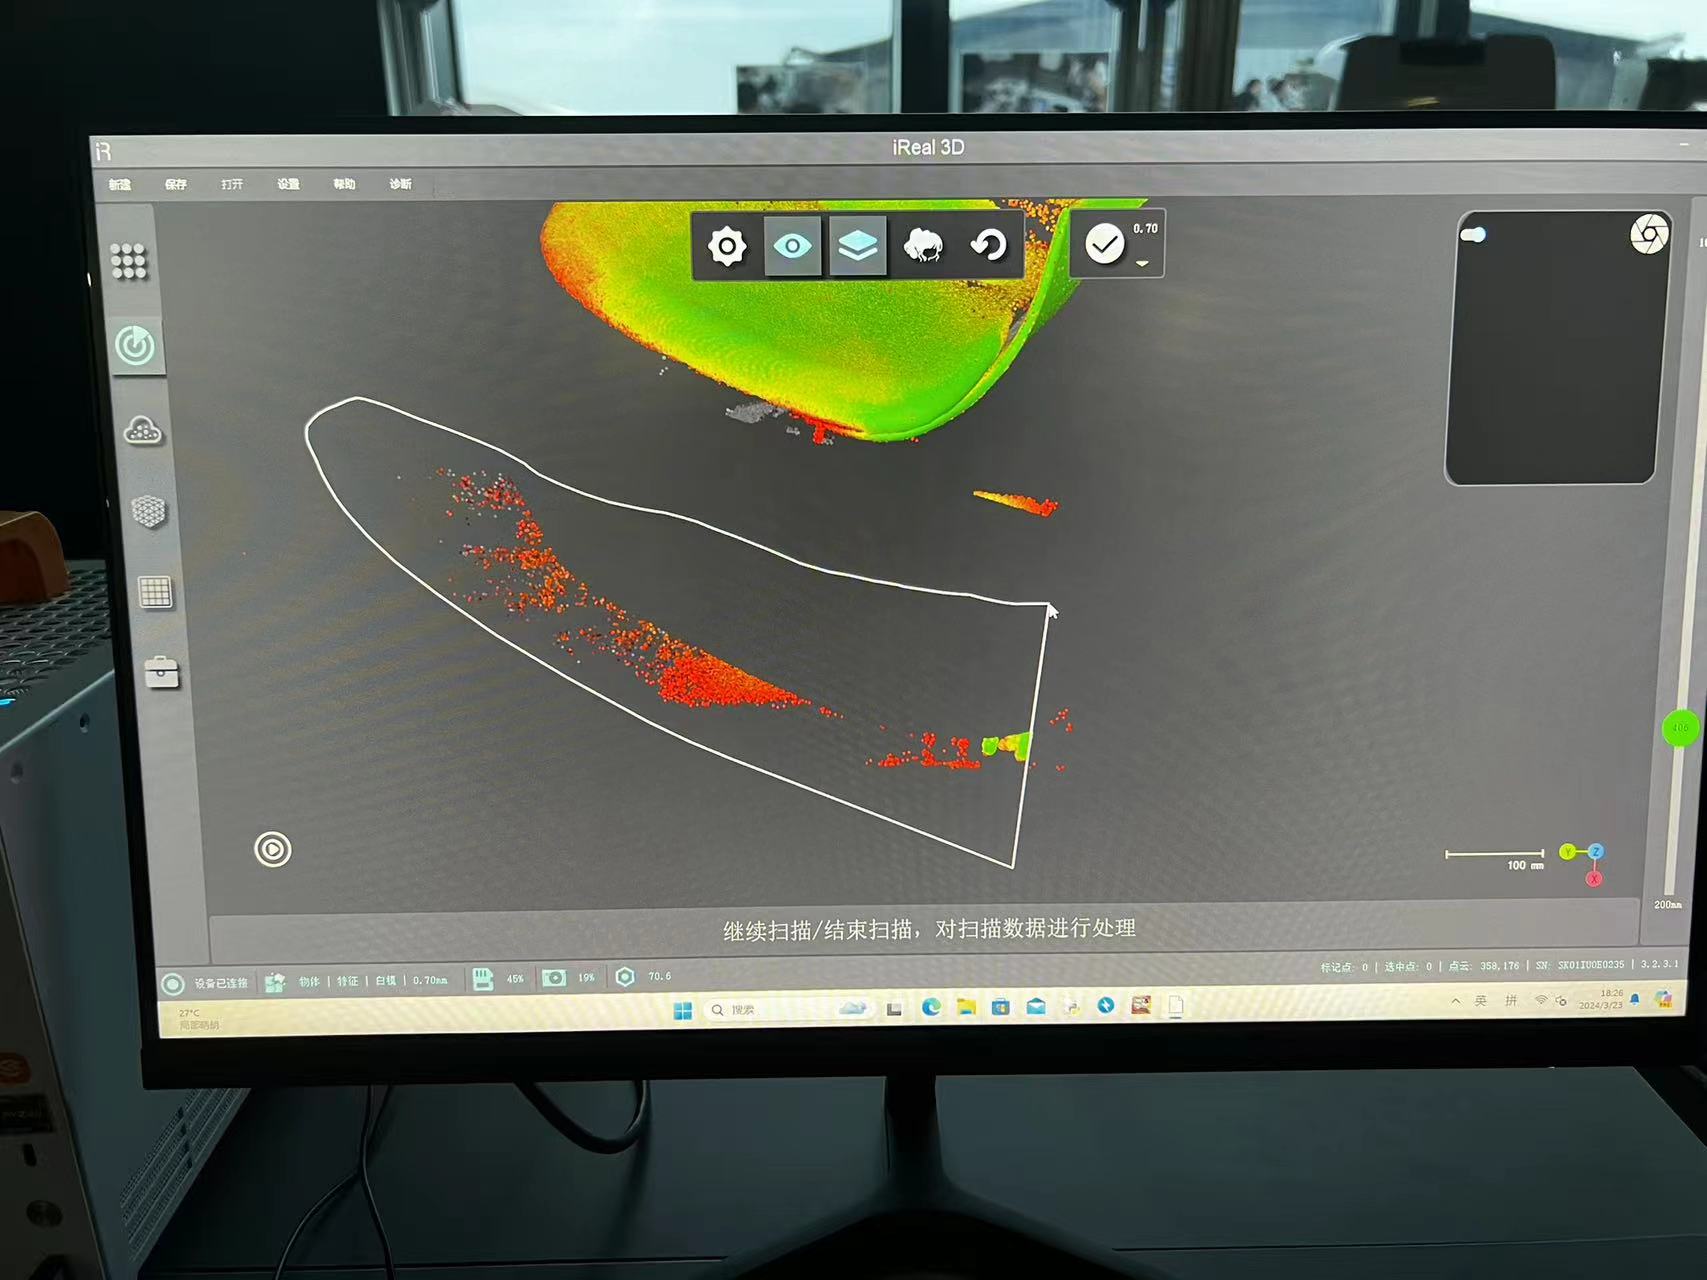
Due to time constraints, we were not able to fully utilize the scanner, and I ended up with many scan source files.
However, the iReal3D software requires a key in my presonal computer to process these files,
which prevented me from completing the final generation of the 3D model in .obj format.
Hero Shots
3D Design of Wheel
3D Scanning of a chair
Team Assignment
Group Assignment link.
In the group assignment, I used the Ender-5 S1 located in the Aisha node.
Ender-5 S1


Assignment files
Let's Jump to the Top !!!